B’s Oregano Cashew Spread

Hello everyone!  I’ve finally tried a cashew spread that I’ve become reading on vegan blogs forever…  Although, a Vitamix seems to do a much creamier job.  Maybe one day I’ll finally invest in on – or maybe I’ll win one! Haha!  There’s always a benefit to being optimistic.  Or maybe Vitamix will read this and want to give me one. OK SO MAYBE.


Image\

It kind of resembled Ricotta Cheese but a lot healthier 🙂

Image

I’ve been using it as a dip for carrots 🙂


B’s Oregano Cashew Dip

Makes: Enough for 2-3 people as a side

Ingredients:

  • 3/4 cup of soaked cashews overnight
  • 1-2 tbsp of lemon juice (depends on preference)
  • 1-2 tbsp of water
  • 1 tsp or more of oregano
  • Salt, Pepper and any other seasoning you like!

Method:

  1. Put everything in a food processor.  
  2. Taste and add anything else you might want 🙂
  3. Refrigerate a few hours and store in an air-tight container.

Hope you enjoy this vegan dish!  I absolutely loved it as a healthy alternative.  It’s very easy too 🙂

xx

B

Advertisement

B’s Crispy Kale Recipe

Hope everyone had a good weekend.  Somehow weekends always bring about “cheat” days for those who are dieting!  I know they do for me 😉  So here’s to some healthy food *cheers* 🙂

Crispy Kale is delectable and very nutritious!  Kale is a superfood – a food often eaten by gorillas (surprisingly!).  They are packed with nutrients such as:  Vitamin K, A and C.  It also has copper, calcium and manganese.  Actually the list goes on but these are the significant nutrients in Kale.  However, always remember to buy ORGANIC KALE as you wouldn’t want to be eating pesticide instead of nutrients.  The detrimental effects would largely outweigh the benefits of it being a healthy vegetable in the first place!

Image

Make sure to trim all the stems out and break kale into pieces…

Image

Dry the leaves properly…

ImageLay out in a baking sheet ensuring that leaves are spread out and not overlapping…

Image

Crispy and flavourful – right out of the oven! 🙂

My recipe featured on Almonds & Raisins:

Screen Shot 2014-10-01 at 14.24.27

Screen Shot 2014-10-01 at 14.24.56

Hope you guys like it! x

B’s Crunchy Chickpea Bites

I’ve been reading about roasted chickpeas online as a healthy snack and have been meaning to try them forever.  The final push was when I saw a post by Celeste and thought OK,  I should give it a go!  Her recipe was completely different than mine but i might try hers out too!  I made mine a bit spicy and with indian infused flavours 🙂  It came out delish so much so that I forgot to take a picture of the final product.  I will add it to this post when I re-make it.  This just goes to say how yummy it was that I was completely thrown off-track.

Benefits of Chickpeas:

  • High Fibre content
  • Contains Iron
  • Source of Protein
  • Contains Manganese
  • Low GI-index, controls sugar and keeps you full longer (good for weight loss too!)

These are few motivating factors for you to consumer chickpeas as a vegetarian!

Here’s what I did:

ImageMixed all the flavours on dry chickpeas…

Image

Lay them out on a baking sheet, making sure they don’t overlap… BAKE AWAY AND EAT!

B’s Crunchy Chickpea Bites

Makes: One big bowl

Ingredients:

  • 1 can chickpeas  (drained, washed and dried)
  • 1/2 tsp oil
  • Flavourings: 1/2 tsp chilli powder, 1/2 tsp cumin powder, 1/4 tsp turmeric powder, salt & pepper to taste

Method:

  1. Preheat oven to 200 C.
  2. Wash the chickpeas and drain them.  Dry thoroughly on paper towel.
  3. Mix chickpeas with flavourings and oil.
  4. Roast for 35 – 45 minutes, depending on how crunchy you want it.  (I roasted mine for 40 mins)

Notes:  Make sure the chickpeas are DRY.  If not it would result in the bites being soggy rather than crunchy!!

Enjoy this fibre-rich low fat snack!  It’s much better than munching on crisps and gives you similar satisfaction 🙂

xx

B

Easy Fresh Home-made Artisan Bread…!

We have stopped buying bread in our house and I make it instead.  When I told my brother, he implied I have become a miser. It was pretty funny comment, I was like huh?  NO!  I don’t bake bread to save money. YES, it is a cheaper alternative but really switching to home-made bread is not going to get me haute couture with the saving!  I would need to bake 20000 loaves to justify a LV bag (I’m not into justifying my purchases btw!) hahaha.  Why do I bake bread?  It’s so tasty and so easy. Usually yeast creeps me out.  I have yeast-o-phobia – the whole bubbling process makes me sick.  However,  I came across this recipe and the simplicity of it made me want to try it.  The recipe was adapted from Artisan Bread in 5 minutes!  I changed the flour from all-purpose to strong white as that’s what I had on hand.  I loved it!  Will be trying multi-seed next time.

Advantages of home-made bread:

  • YUMMY (most important!)
  • Healthy – the recipe has zero oil.  Compare this 4-ingredient bread recipe to any store-bought that has 20 ingredients which are unnecessary! (It’s alarming if you read the ingredient list)
  • Cost-effective (20000 loaves baked can buy you an LV BAG LOL)
  • Your house will smell of fresh bread…Mmmmmm.

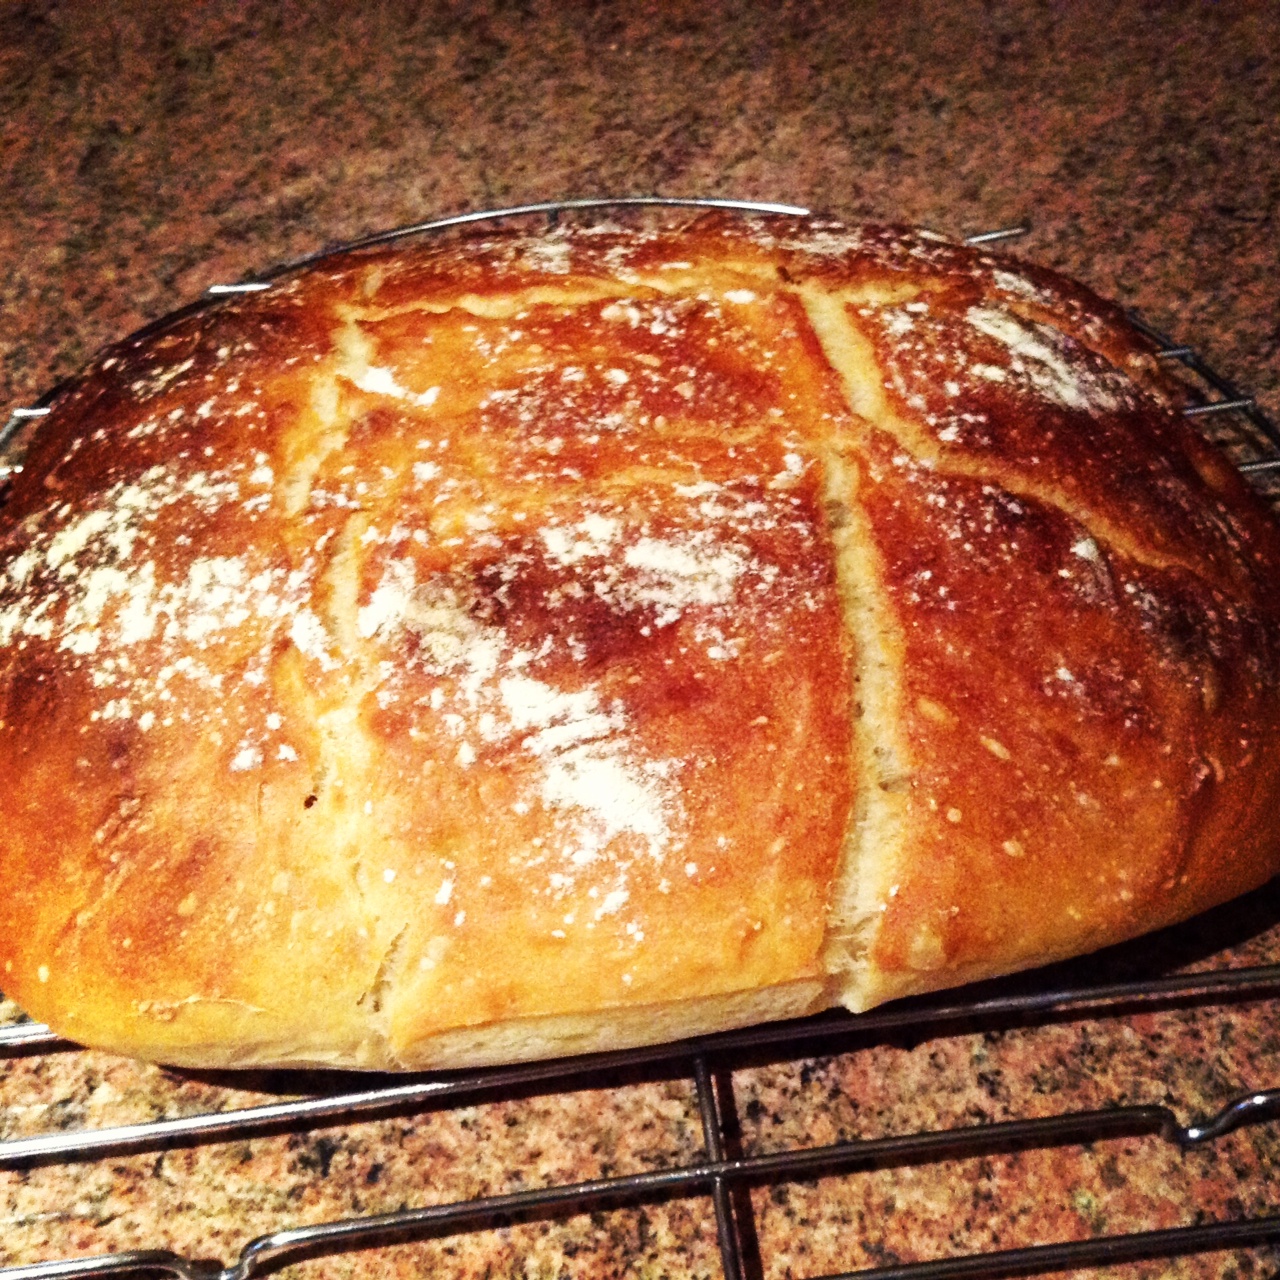
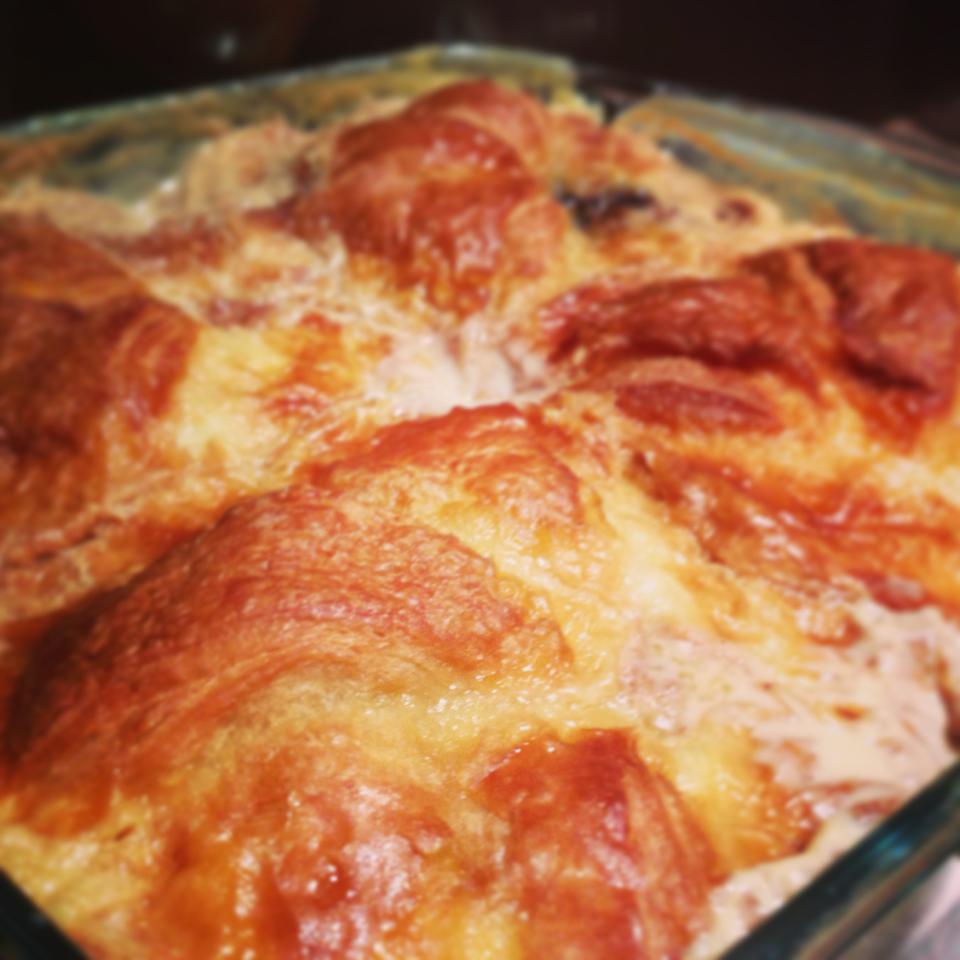
WARNING:  AFTER BAKING THIS, THERE’S NO GOING BACK!! A picture of my beautiful baked loaf…

Image

Doesn’t that just look gorgeous?  The first time I baked it, I was amazed too.  How can something that simple to whip up, be that mouth-watering? Hmmmmm….

Here are a few snaps to demonstrate how I made it…

Image

Mix the ingredients together for 2 minutes… Flour, Yeast, Salt and Lukewarm Water.  Amazingly easy. 😉

Image

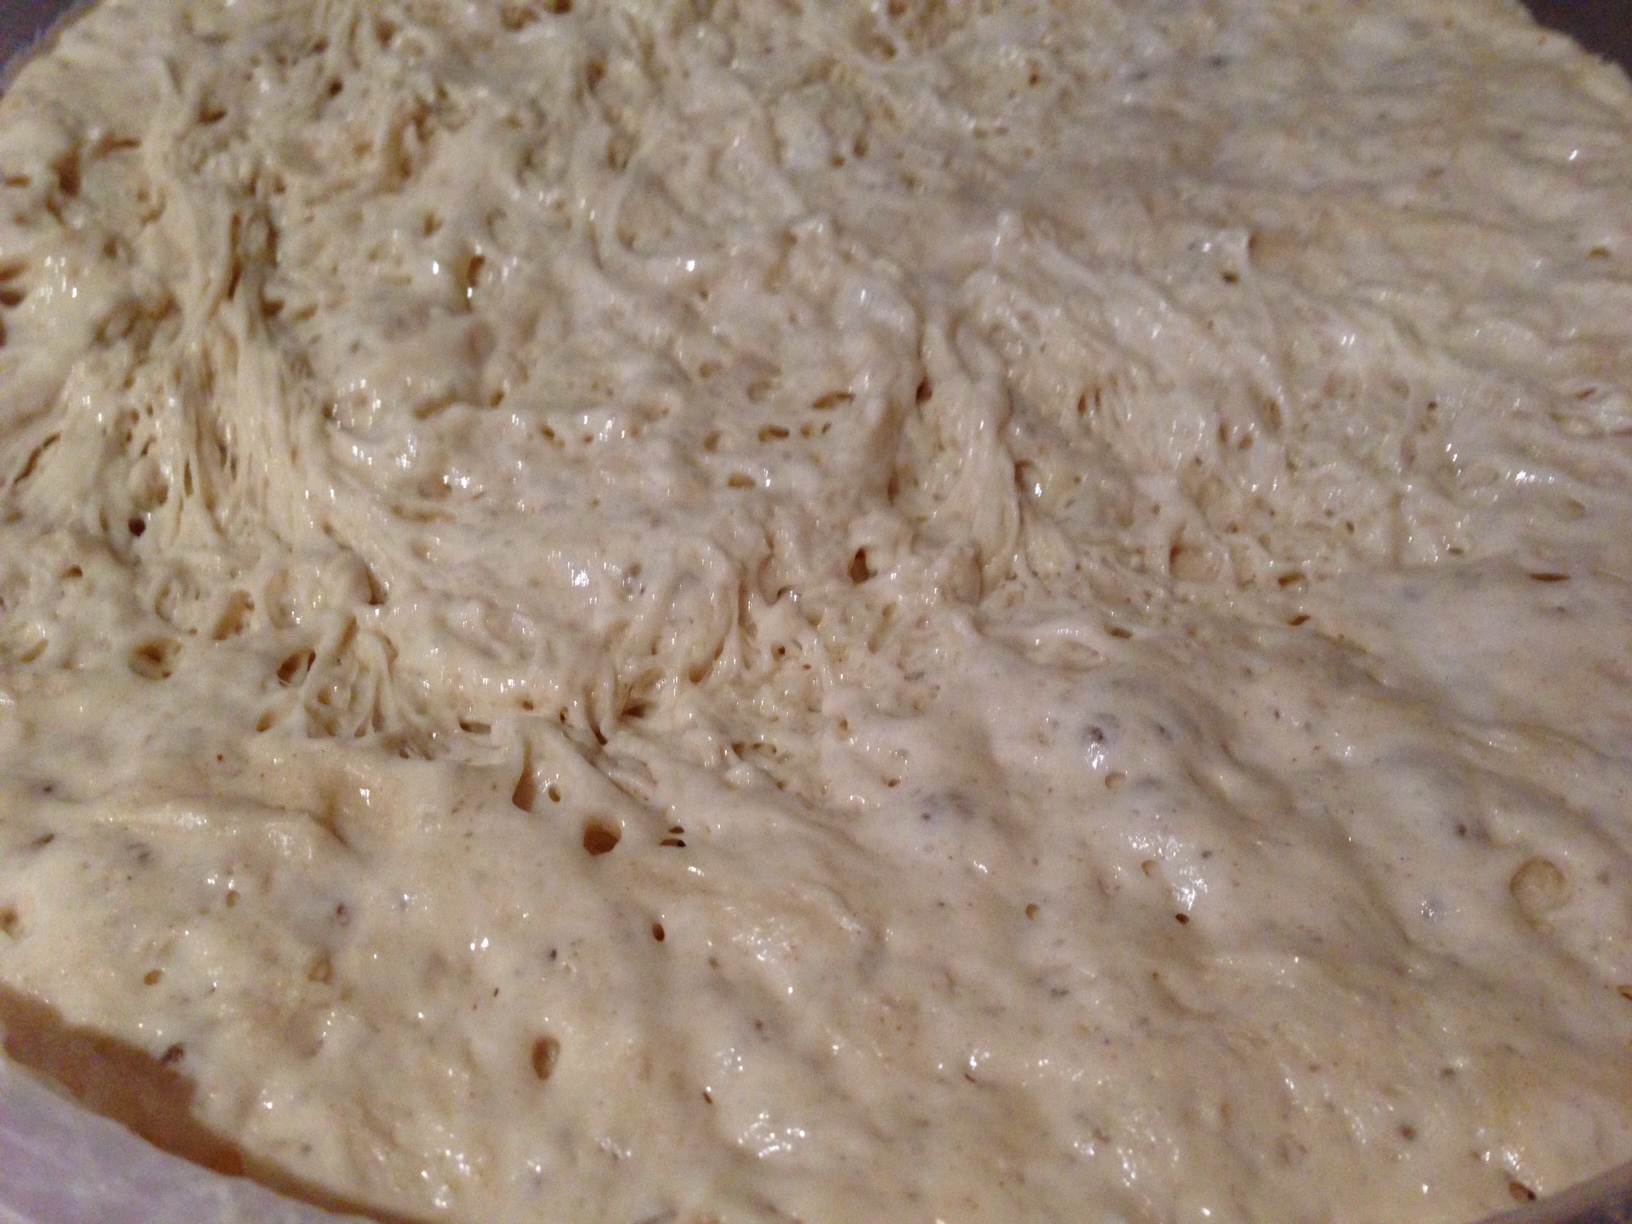
Cover with a foil and keep it away for 5 hours.

Image

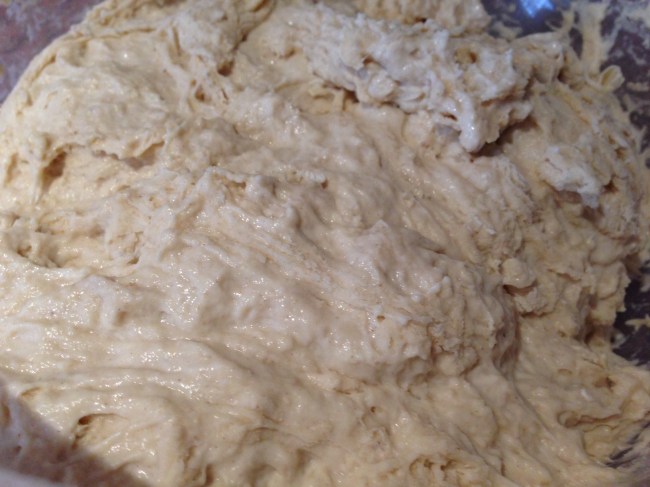
After 5 hours, it will look like this!  It’s extremely slimy to work with (on the first day)… But this is the dough!

Image

Yummy… Bread slices pan fried. OMG. I have died and gone to heaven at this point.

I am typing this recipe by memory btw!  This emphasises on how easy it is, and how often I bake it!

EASY HOME-MADE ARTISAN BREAD

Makes: Enough 2 big loaves or 3 small loaves

Ingredients:

  • 6 1/2 cup strong white flour
  • 1 1/2 tablespoons coarse sea salt
  • 1 1/2 tablespoons yeast
  • 3 cups lukewarm water

Method:

  1. Mix wall the ingredients together with a wooden spoon in a big bowl (as it will double in size later)
  2. Cover with a foil for 5 hours.
  3. Use a knife to divide dough into half (I’d recommend a day after as it’s slimy on the first day!  Hard to work with, but not impossible!)
  4. Form a ball and cover with flour.
  5. Grease a small roasting tin with butter and place dough there for half an hour.
  6. Preheat oven to 235 C.
  7. With a knife cut 3 lines in the bread (so air can escape while baking!).  Also dust a bit of flour for aesthetics.
  8. Bake for 33-34 mins and leave to cool on a wire rack.  Place some water (about 1 cup) in another roasting tin and put beneath the bread.

Notes:  The dough can stay in the fridge in an airtight container for 2 weeks!  I’ve personally only tried till a week as my husband loves bread!  I prefer making the dough a day in advance as I find the dough much easier to work with.

B’s Easy Guacamole (Avocado Spread) Recipe

HOLY MOLY – GUACAMOLE!

I’m trying to go back to my healthy eating regime.  It’s really a challenge with all the visitors that keep coming to London. No guest would like a bowl of salad for a meal or a healthy spread.  But since everyone’s gone for now – I can eat healthy again.

I made a guacamole spread as I had 2 avocados in the fridge and didn’t feel like eating them raw in salad. It’s really very easy for those of you who haven’t made it before!  I leave out onion and garlic just for the added simplicity.  However, you can fancy it up all you want!

Many people mash the avocado up but I prefer it to be a smoother paste.

I blended my ingredients to form a paste:

ImageThe creamy spread after I seasoned it:

Image

It was lovely!  Tasty and healthy vegetarian food, you can’t go wrong!

B’s Easy Guacamole (Avocado Spread)

Ingredients:

  • 2 avocados (ripened)
  • 4-5 cherry tomatoes
  • 1-2 tbsp lemon juice
  • 1/2 tsp cumin powder
  • Salt and Black Pepper to season

Method:

  • Mash avocado.  Put it into a blender/chopper with cherry tomatoes cut into halves.  Blend till its a creamy paste.
  • Remove into a bowl and season with lemon juice, cumin powder, salt and pepper!

So easy, so tasty, so… there’s just no excuse 🙂

xx

B

Easy & Vegan: Scrambled Tofu

Prior to being Vegetarian, one of my favourite combinations was scrambled egg with rice.  Growing up I used to have it like fried rice, more like butter-glistening rice with egg.  It was my go-to comfort food 🙂

I’ve now found a replacement to suit my new vegetarian lifestyle.  It’s been 10 years.  It’s definitely a commitment that I hope would be life-long.  So anyways!  I made tofu scramble for lunch yesterday, didn’t want it to have butter/oil or any fat.  So here’s a low fat, protein filled easy recipe.

But hold on – first have a sneak peak...

Image

It was yummy!  Packed with flavour and grilled asparagus on the side. 🙂

All you need is:

Image

B’s Tofu Scramble

Makes: Enough for 1 (or 2 if you are eating with something else on the side)

Ingredients:

  • 1 packet Firm Silken Tofu (refer to the picture)
  • Seasoning: Turmeric, Red Chilli Powder, Soya Sauce, Salt, Pepper

Method:

  1. Put the block of tofu in the pan.  Keep mashing it.  All the excessive water to evaporated.
  2. It usually takes around 5-7 minutes on high flame.
  3. Keep mashing.  When it is dry and resembles egg, start seasoning.
  4. Start off with some Turmeric (about 1/2 tsp) to give it an egg color.
  5. Add chilli powder, soya sauce, salt and pepper to taste.

Note: I like a lot of flavour, as a result I add a lot of seasoning.  Always remember that tofu, unlike egg is rather bland.  Season away!

Enjoy it with brown rice and a side or even on top of savoury waffles with sausages. (I have had that before too, and it was really good!) 🙂

Enjoy! 

xx

B

B’s Nutella Croissant Bread Pudding

Image

YUMMY.  This recipe came about one day when we didn’t have bread in the pantry but had croissants. We wanted bread pudding but didn’t have bread.  That just sounds ridiculous to not have the core ingredient!  Then I thought to myself – croissants would be a far better substitute.  The texture of croissants allow greater absorption of the creamy mixture and biting into that – would well be somewhat divine.  Bread pudding is already such a treat, can you imagine it with buttery croissants?  My husband LOVES NUTELLA.  He eats it from the jar.  That got me thinking…  Buttery croissant pudding with.. Nutella?  Better still, imagine it with oozing nutella. YUMMY.  So I set it out to make it right!

I’ve made this 2-3 times as its still a pretty new invention.  We had a poker night this weekend, so thought it was ideal for it.  🙂

Here’s the recipe for you to try out!

B’s Nutella Croissant Bread Pudding

Makes: 1 tray/pyrex

Ingredients:

  • 4 butter croissants
  • Nutella (as much as you desire!)
  • 700ml – 1 litre milk (depends how thick you want it)
  • 1 cup double cream
  • 1/3 cup sugar
  • 4 1/2 tbsp custard powder
  • Vanilla essence to taste

Method:

  1. Cut the croissants in half and put Nutella in the middle as a stuffing.
  2. Lay the Nutella prepared croissants in a dish.
  3. Beat together the milk, double cream, custard powder together.  Add the sugar and vanilla essence.
  4. Bake at 180 degrees for about an hour.

Enjoy this easy dessert with simple pantry ingredients!  xx

Foodie Fridays: Fruit Jelly

My aunt brought me packets of Agar Agar from Singapore, so i decided to use some up!  I googled a few fruit jelly recipes with agar agar as an ingredient so it’ll be vegetarian.  I quite liked this youtube video where this guy mixed agar agar fruit with a cake layer.

I had just made Nutella Cake 2-3 days ago and had some left overs which I could use in the jelly – so this recipe became an instant winner.  A picture of the final product!Image

I put the jelly in small moulds as it made nicer individual treats.  Although next time I want to try it in a cake mould.  A jelly cake with real cake!

B’s Jelly Agar Agar with Strawberries

Makes: 4 small moulds

Ingredients:

  • 2 tsp agar agar powder
  • 3-4 tbsp sugar (you can just omit it if you want)
  • Handful of cut strawberries
  • Some leftover cake cut into cubes

Method:

  1. Arrange strawberries in the mould facing downwards.
  2. Boil half the water and add 1 tsp agar agar and 2 tbsp sugar.  After the powder is dissolved, pour into the mould.  Freeze for 10 mins.
  3. Remove from freezer and pierce the top jelly a bit with a fork.  Add the cubes of cake on top of this layer.
  4. Repeat step 2 for another jelly layer.  Add it.  Freeze for 10 mins.  Refrigerate till you want to eat it.  Remove it from the mould and serve it inverted!

Easy and a great summer delight.  This would make a healthy snack if you omit the sugar out completely.

xx

B’s Quick & Healthy Hummus Recipe

Hello everyone!  I’ve restarted my gym regime which means just one thing: time to zip my mouth to everything tempting.  Hmmm… Or so you would think.  I’ve decided to try out healthy dips and snacks that are still tempting minus the high calorie count.  Today I tried out my very own hummus recipe.  Basically most recipes online for hummus incorporate a high level of olive oil.  Fair enough, in the restaurants it is served that way – but if I eat my carrot sticks in an oil based dip, what good is it really?

Mixing everything up to form a smooth creamy paste:

Image

And the final product:

Image

Here’s my recipe:

B’s Quick & Healthy Hummus Recipe

Makes: One bowl

Ingredients:

  • 1 can chickpeas
  • 1 tbsp olive oil
  • Pinch of chilli flakes/paprika
  • 1 tsp cumin powder
  • 3-4 tbsp water
  • 1 tbsp lemon juice
  • Salt and Pepper to taste

Method:

  1. Spoon chickpeas from the can instead of draining.  The liquid adds flavour!
  2. Add all ingredients and blend away 🙂

Note:  Adjust the consistency to your preference by adding more or less water.  Best served chilled – I refrigerated it for 15 mins. I couldn’t wait any longer! 🙂

Enjoy!!

xx

B

Pad Thai

Hello everyone!

In the midst of packing – I made a scrumptious Thai meal (Vegetarian Pad Thai).  Easy to whip up for busy days.  Thought I’d share it before going since my flight is pretty late at night anyways.  I made extra so my husband can have it for lunch tomorrow.  I’m nice like that. 🙂 So- voila!

photo (3)It’s actually just a rice-noodle stir fry with Thai flavours infused in it.  Very popular in Thailand 🙂

So here’s how I made it – hope you like it too!  I actually don’t have it on Paprika since I don’t use a recipe for it.  It’s my own version. 🙂

YUMMY-VEGETARIAN PAD THAI (for 2)

Ingredients:

  • Rice noodles (1/2 packet)
  • Tofu (1/2 packet)
  • Bean sprouts
  • Chives – cut into small pieces
  • Roasted peanuts – grind
  • Seasoning: Red chilli powder, Light Soya Sauce, Dark Soya Sauce, Brown Sugar, Salt, Lemon Juice, Cut Red Chilli

Method:

  • Soak rice stick noodles in hot water for about 10-15 minutes until they are soft.  Rise off.
  • Pan-fry the tofu in big squares.  Cut them up into little pieces after and keep aside.
  • Put some oil in the pan, throw in all the ingredients except for peanuts.
  • Stir fry everything together and add the seasoning.
  • Season to taste
  • Guidelines of my seasoning to my taste (lol):  About 1 tsp red chilli, you can cut some red chilli on the side too.  Around 2 tsp of light soya sauce and a bit more of dark to give it a nice color. Keep trying as you go along as there are different brands which have a distinct flavour.  I put about 3 tbsp of brown sugar (quite a lot!)  And I just put a tiny bit of salt (since soya sauce is salty).  I put about 2-3 tsp of lemon juice.
  • Lastly, add peanuts and garnish with cut red chili.  Enjoy!

**Basically my tip with seasoning would be to keep trying as you go along till you are happy with the taste.  I personally do not take too much spice. It’s meant to have a sweet-salty-spicy flavour!

Good luck and happy cooking!

XX

B