Foodie Fridays: Japanese Bento

My friend from Japan gave me a beautiful gift.  Two Bentos!  I’ve been looking around for them but haven’t come across any in London.  I saw a nice one on Amazon but it was 33 pounds for ONE BENTO.  That is crazy.  I briefly mentioned it to her and she was so kind to get me 2 as a gift.  I insisted to pay her back but she said it was from a closing down sale and it was pretty cheap (I’m hoping that was true) 😉  When people are kind to you – its just heart warming and worth a mention.

Since I got back I’ve had the urge to use the Bentos, so I finally did!

Image

The eating experience was just so much nicer.  An easy meal became an extravagant meal!

FYI – The Bento consists of Brown Rice, Grilled Carrots, Asparagus & Mushrooms, Pan-Fried Tofu Steaks with a drizzle of Teriyaki Sauce, Quorn Chicken Strips with Japanese BBQ sauce and sesame seeds. Garnished with Japanese Ginger and Wasabi 🙂

Thanks Trendy x

Advertisement

Foodie Fridays: B’s Kitsune Udon Recipe (Japanese Noodle Soup)

Hello happy humans!  It’s Friday 😉  I love sleeping in on Saturday – the feeling is just magical.  So I’ve had a busy day involving completing my App’s ICON!  How amazing is that?  I’m terribly excited.  🙂  Coming back to Foodie Fridays –  I’ve been eating healthy food at home to compensate for fatty food that will be coming my way (weekend).  I had udon noodles and veggies at home – and thought it would be a healthy vegetarian lunch for my husband and I.  It’s been so cold in London, so it was really comforting as well. This is an easy meal to whip up too when you are busy but do not want to eat out of a packet! 🙂

FYI: Work with two pans – it’s faster and easier to serve the noodles then pour the soup mixture on top!

Image

And the end result:

Image

Healthy veggies & tofu 🙂

B’s Kitsune Udon (Japanese Noodle Soup)

Makes enough for 2 people

Ingredients:

  • 2 packets Udon Noodles
  • 2 carrots, chopped
  • 5-7 mushrooms, chopped
  • Asparagus, chopped
  • Some tofu, chopped in cubes
  • Seasoning:  1 tsp Mushroom Seasoning Powder, 1 TBSP Miso Paste, 1 cube of OXO Vegetarian Stock, pepper, 1/2 tsp chilli powder, 1/2 tsp soya sauce

Method:

  1. Cook Udon noodles – boil in water (follow package instructions)
  2. Put about 1 tbsp of sesame oil and stir fry mushrooms.  After a few minutes add carrot then asparagus.  Add a bit of water and cook.
  3. Add water and miso paste.  Keep stirring till fully dissolved,  Add soup stock and all seasoning.  Add the tofu.
  4. Serve on top of noodles!

Note:  Kitsune Udon is usually prepared with fried tofu which is available in Asian Shops.  It has a spongy texture and absorbs flavour very well.  However the fat sitting on my stomach right now is not allowing me to eat that kind of tofu.  SO THERE YOU HAVE IT. Low fat.  You can change the veggies to your liking –  I just used up what I had in my pantry!

Hope everyone has a fantastic weekend!  I’m going for some retail therapy this weekend.  It’s been a hectic week -that’s why I’ve barely posted!

xx

B

Foodie Fridays: B’s EASY STOVE-TOP HOMEMADE SALTED POPCORN RECIPE

Hello!  I’ve been trying popcorn at home.  I’ve adapted my recipe from this blog.  I really can’t believe how incredibly easy it is to make popcorn.  Not to mention – how cheap it is too!  (Cinemas mark up the price by 1000% or more! HAHAHA) Popcorn is best eaten when its warm 😉  Actually I love sweet popcorn (cinema-style) and have tried 2 different recipes but am not fully satisfied with the outcome.  So if anyone knows a good one, please leave me a comment or link!! 🙂

And here’s the picture of my home-made popcorn:

Image

B’s EASY STOVE-TOP HOMEMADE POPCORN RECIPE

Makes: Enough for 2 hungry people

Ingredients:

  • 1/2 cup corn kernels
  • 4 tbsp oil (enough to cover entire base of pan)
  • 1 tsp salt
  • 2 tbsp butter

Method:

  1. Put oil in pan on medium heat,
  2. Add kernels and give it a shake to ensure kernels are coated evenly with oil.
  3. Put the lid on the pan (loosely) to allow air to escape.
  4. Give the pan a bit of a shake.
  5. Kernels will pop in 1-2 mins.
  6. Transfer popped corn (LOL poped corn = popcorn! LOL)  in a bowl and drizzle with butter and salt.

Note:  Putting half the amount of salt in the oil works well too.  😉  Do as you prefer!!

Enjoy!

xx

B

Foodie Fridays: Tofu Breakfast Muffins with Quorn Bacon = B’s Eggless Egg Muffins Recipe!

I tried making this at home after thinking about how much I loved McDonald’s Egg Muffins when I was non-veg.  I tried to somehow make a vegetarian version of Egg Muffins!  It was divine.

Here’s the result!

Image

It was really easy too!  Great for a weekend brunch 😉

The most important step is marinating the tofu so the flavour and colour gets absorbed properly.

Here’s a picture of how the tofu pieces should look after marinating it:

Image

B’s Tofu Breakfast Muffins with Quorn Bacon 

Makes: 4 Muffins

Ingredients:

  • Half packet of firm tofu cut into big rectangles (see picture above)
  • Quorn Bacon Slices
  • 4 Muffins
  • Cheese Slices
  • Seasoning: Turmeric Powder, Soya Sauce, Chilli Powder, Salt, Pepper (Mix in a bowl

Method:

  1. Place kitchen towel under and over tofu pieces to absorb extra moisture.  Leave for half an hour.
  2. Marinate the tofu with the seasonings mentioned above.
  3. After half an hour, pan-fry the tofu patties till they are done (a bit crispy on both sides).
  4. Pan fry the bacon slices.
  5. Assemble with cheese in the muffins.

Enjoy it with any sauce you like 😉  I had it with BBQ sauce and baked beans on the side with hash browns!

xx

B

Foodie Fridays: B’s Red Sauce Topped Over Spinach & Ricotta Tortellini

Last night’s dinner was divine.  Well, how can anything with cheese be less than divine?  😉

Image

I felt guilty using everything that was basically ready-made so I made the red sauce.  I like pasta extra saucy so I make sauce in abundance!

B’s Red Sauce Topped Over Spinach & Ricotta Tortellini (EASY)

Makes enough for 2 starving souls.

Ingredients:

  • 1 packaged of Spinach & Ricotta Tortellini (I have no skill or patience to make my own pasta! LOL)
  • Some olive oil (around 2 tbsp)
  • Handful of Cherry Tomatoes (the more the healthier) I use about 250g- cut in halves
  • 1/2 onion
  • 1 can of Italian Plum Tomatoes
  • 1 can tomato puree or ready made red sauce (optional just to increase the amount of sauce)
  • 2 tbsp of concentrated tomato puree
  • some cheese (the more the merrier)
  • Seasoning:  fresh basil, dried herbs, salt, pepper, tabasco, 1/2 tsp chilli powder, sugar

Method:

  1. Put oil in pan and cut finely chopped onions.  After onions are translucent and a little brown add tomatoes and cook.  If its drying up add some water and keep cooking.
  2. Add the can of plum tomatoes and the concentrated tomato puree.  Simmer for half an hour or longer.
  3. Cool and blend afterwards.
  4. Add all the seasoning and some water (see your preferred consistency.  I don’t like my sauce to be too runny!) Add sugar according to sourness of the tomatoes.  If you simmer it longer it will be less sour and less sugar will be required to combat it.
  5. Add cheese just before switching stove off so it will be stringy. Yummy! Add it to the prepared tortellini 😉

Note:  I serve it with herb baguette and roasted asparagus to just make the meal a bit more complete! Bon appetite!

xx

B

Foodie Fridays: B’s Easy Jacket Potatoes

Hello all… It’s Foodie Friday again! Yipppeee.  Thought I’d blog about something easy, fatty and British.  JACKET POTATOES.  Simple to make and yummilicious (It’s a word I swear- well it is one in Sparkle Bubble hahaha!).  Here’s an easy recipe!

Image

Hmmm.. Doesn’t that just look delish?  Ok and sort of like a heart-attack on a plate, but we can ignore the fat part.  Whenever I indulge in Jacket Potatoes it becomes my brunch.  I think that honestly compensates for how heavy it is. Spreading it across two meals makes it justifiable. Yes, I love making myself feel better. Hahahaha!

B’s Easy Jacket Potatoes

Bakes: 4 servings, well if you use 4 potatoes. 😉

Ingredients:

  • 4 Jacket Potatoes
  • 2 tins of Heinz Chilli Beans
  • Butter
  • Cheese
  • Salt & Pepper

Method:

  1. Preheat oven to 200 C.
  2. Wash the potatoes.
  3. Cut a cross in the middle of the potato.
  4. Poke all sides with a fork for even baking.
  5. Bake for 1 hour 20 mins.
  6. In the meantime, put beans in a pot and add salt, pepper and any desired seasoning.
  7. After the potato has baked, open the potato up gently and butter the inside.
  8. Pour baked beans generously and top up with cheese.
  9. Return dish to oven till cheese is bubbly!

Note:  You can serve this with coleslaw as it goes very well.  I’ve also made Jacket Potatoes with different toppings such as:  Veg Tuna and Quorn Minced Meat.

Enjoy!

xx

B

Foodie Fridays: B’s 2 Ingredient Granola-Banana Cookies

Hello 🙂  There are so many 2 ingredient recipes floating around that make you think how easy it can be to whip something up!  I came across this website a few days ago and wanted to try somethings out. The ice-cream bread looks like a fantastic idea, I will definitely try it out in B’s Kitchen 🙂

Today, I wanted a healthy but easy snack (I’m recovering from a flu) boo-hoo! Hate having a flu!  Yes, I’m all rhyming today 🙂

I used 1 banana and about 3/4 cup of granola.  EASY & VEGETARIAN!

Image

I used this granola as it had bits of chocolate.  I love the combination of chocolate and banana! 🙂

I mixed the banana and granola in a bowl.  Mashing up the banana is key!  Then mixing it all in is easy (I use disposable gloves to do this as I have long nails and it’s kind of gross otherwise!)

Image

I then made them into tiny cookie sizes.  I didn’t flatten them out much as I prefer it to be soft inside.

Image

I funnily enough forgot to take the end result.  It was hot out of the oven – the smell of banana filled the kitchen and I starting eating.. and eating.. Gave the husband his share.. and then I remembered… “MY BLOG…”

Image

The tiny remain before I ate my last bite! 🙂 YUMMY.

B’s 2 Ingredient Granola-Banana Cookies

Bakes: About 6-8 depending on size

Ingredients:

  • 1 banana (riped is better!)
  • 3/4 cup granola

Method:

  1. Preheat oven to 180 C.
  2. Line baking tray with cookie sheet.
  3. Mash the banana and mix in the granola.
  4. Make sure the mixture is not too dry or wet.  It should be moist like the picture above.
  5. Bake for 15 mins.

Enjoy this healthy vegetarian treat! Great for days when I hit the gym.  I can eat minus the guilt.

xx

B

Foodie Fridays: B’s Vegetarian Tuna Pizza (Without Yeast)

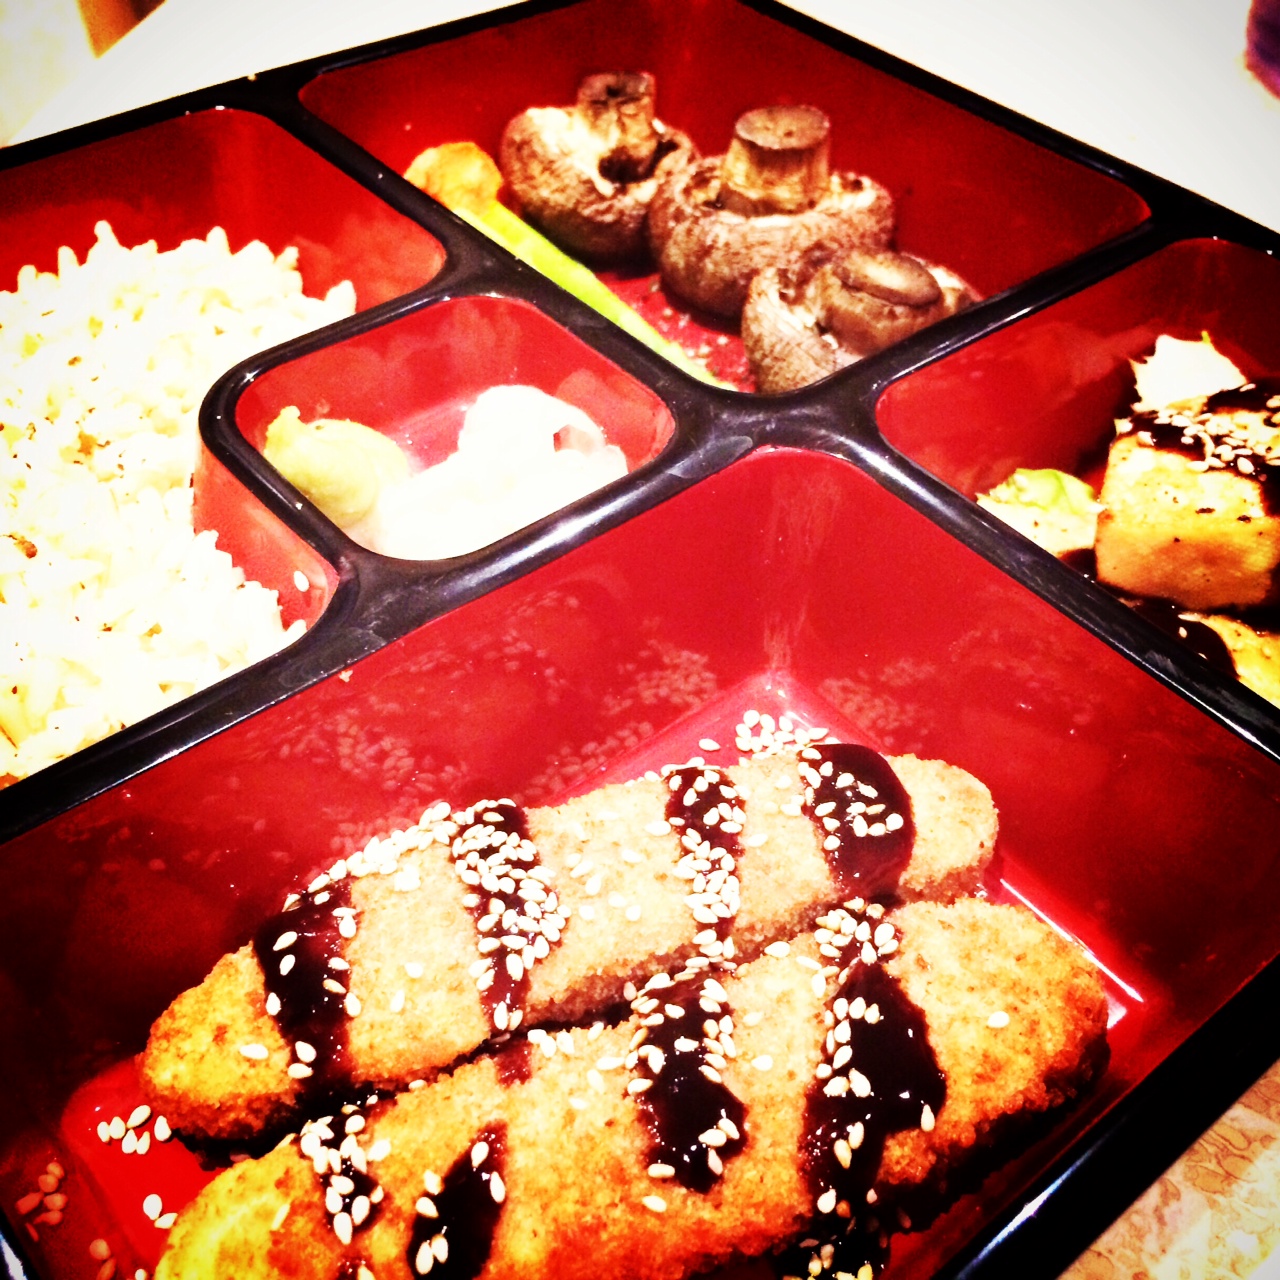
Hello everyone.  I LOVE CHEESE.  I really wish I didn’t as it’s so very fatty, but I just love cheese.  Like love love love cheese.  I hope I have emphasised my undying love for cheese to illustrate my passion completely.  It’s funny how words do not do justice to your emotions at times.  But I’m sure you’ve got the point, if you haven’t, I LOVE CHEESE.

Ater turning vegetarian, I really missed having Tuna as it was one of my favourites.  Fortunately, I discovered Vegetarian Tuna (made from soya).  It actually tastes like the real thing!  I’ve had it in salads and sandwiches so far.  Today, I wanted to try it warm.  I thought I’d try it on pizza.

I’ve always been terrified of yeast.  I don’t know why – I guess yeast rising is creepy in someways.  I googled pizza dough without yeast and gave it a shot!  I came across this link.  Majority of the comments were good, which made me lean towards it!

Here are my photo-steps:

Image

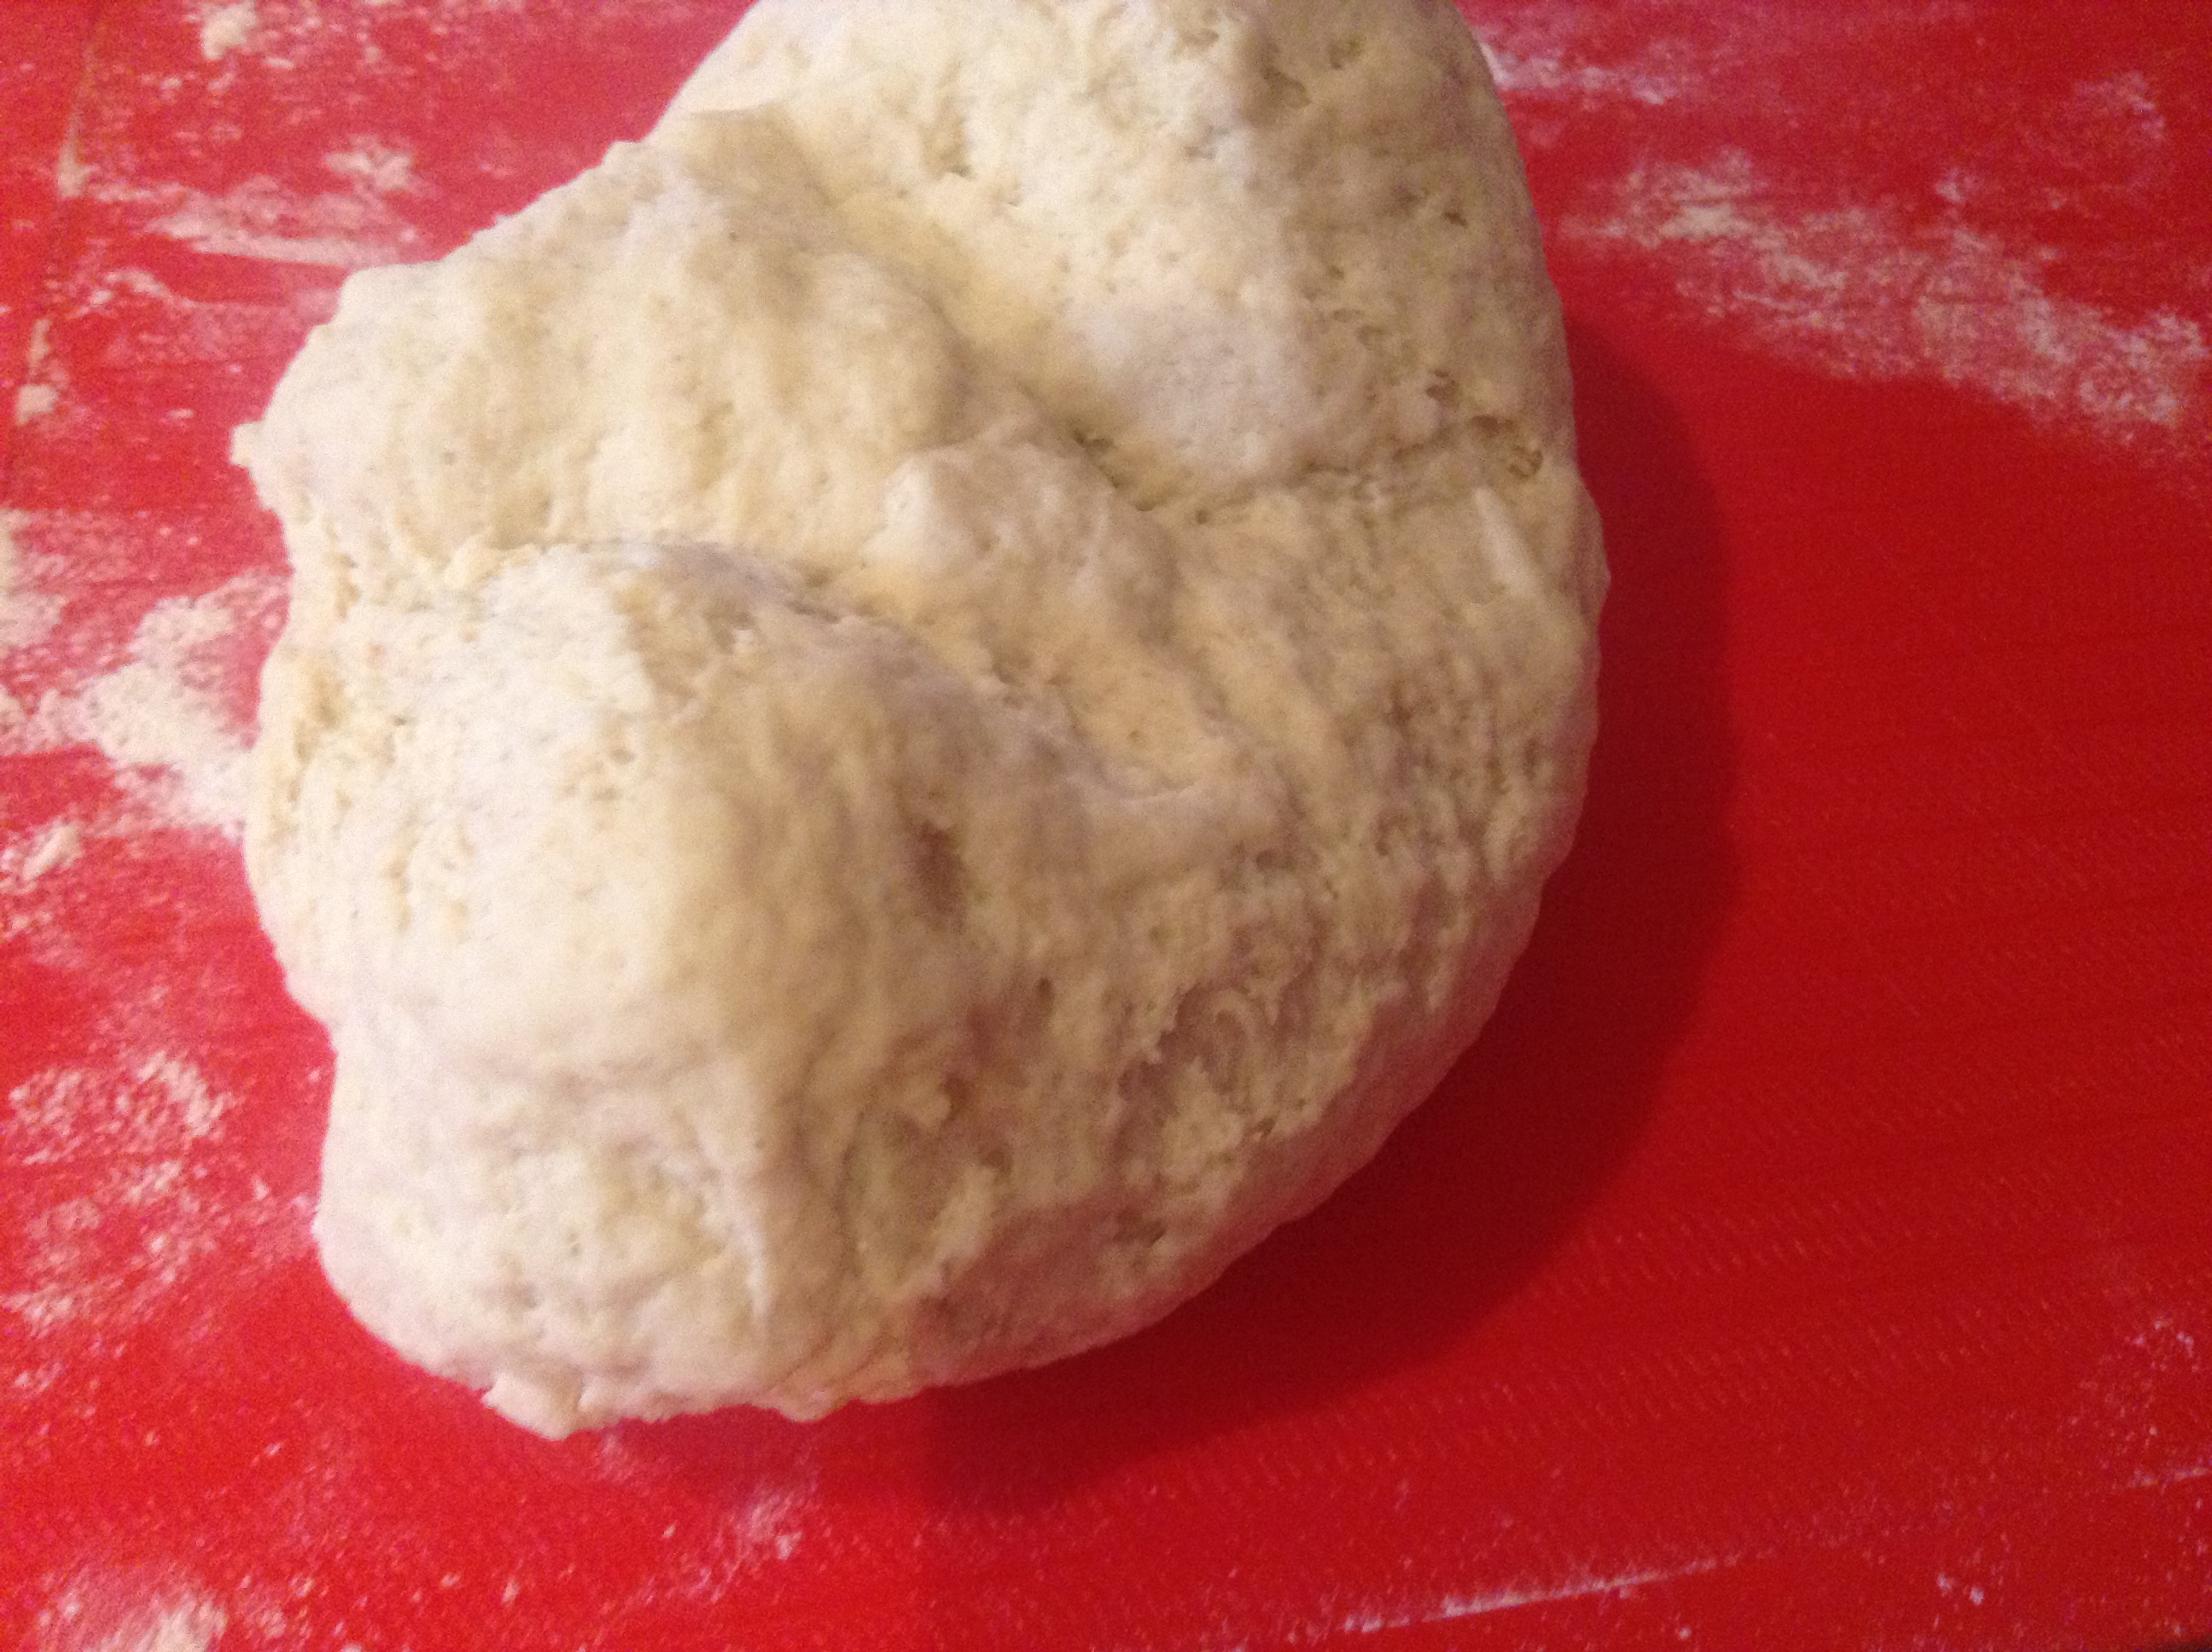
A ball of yeast-less pizza dough. YAEY!!

Image
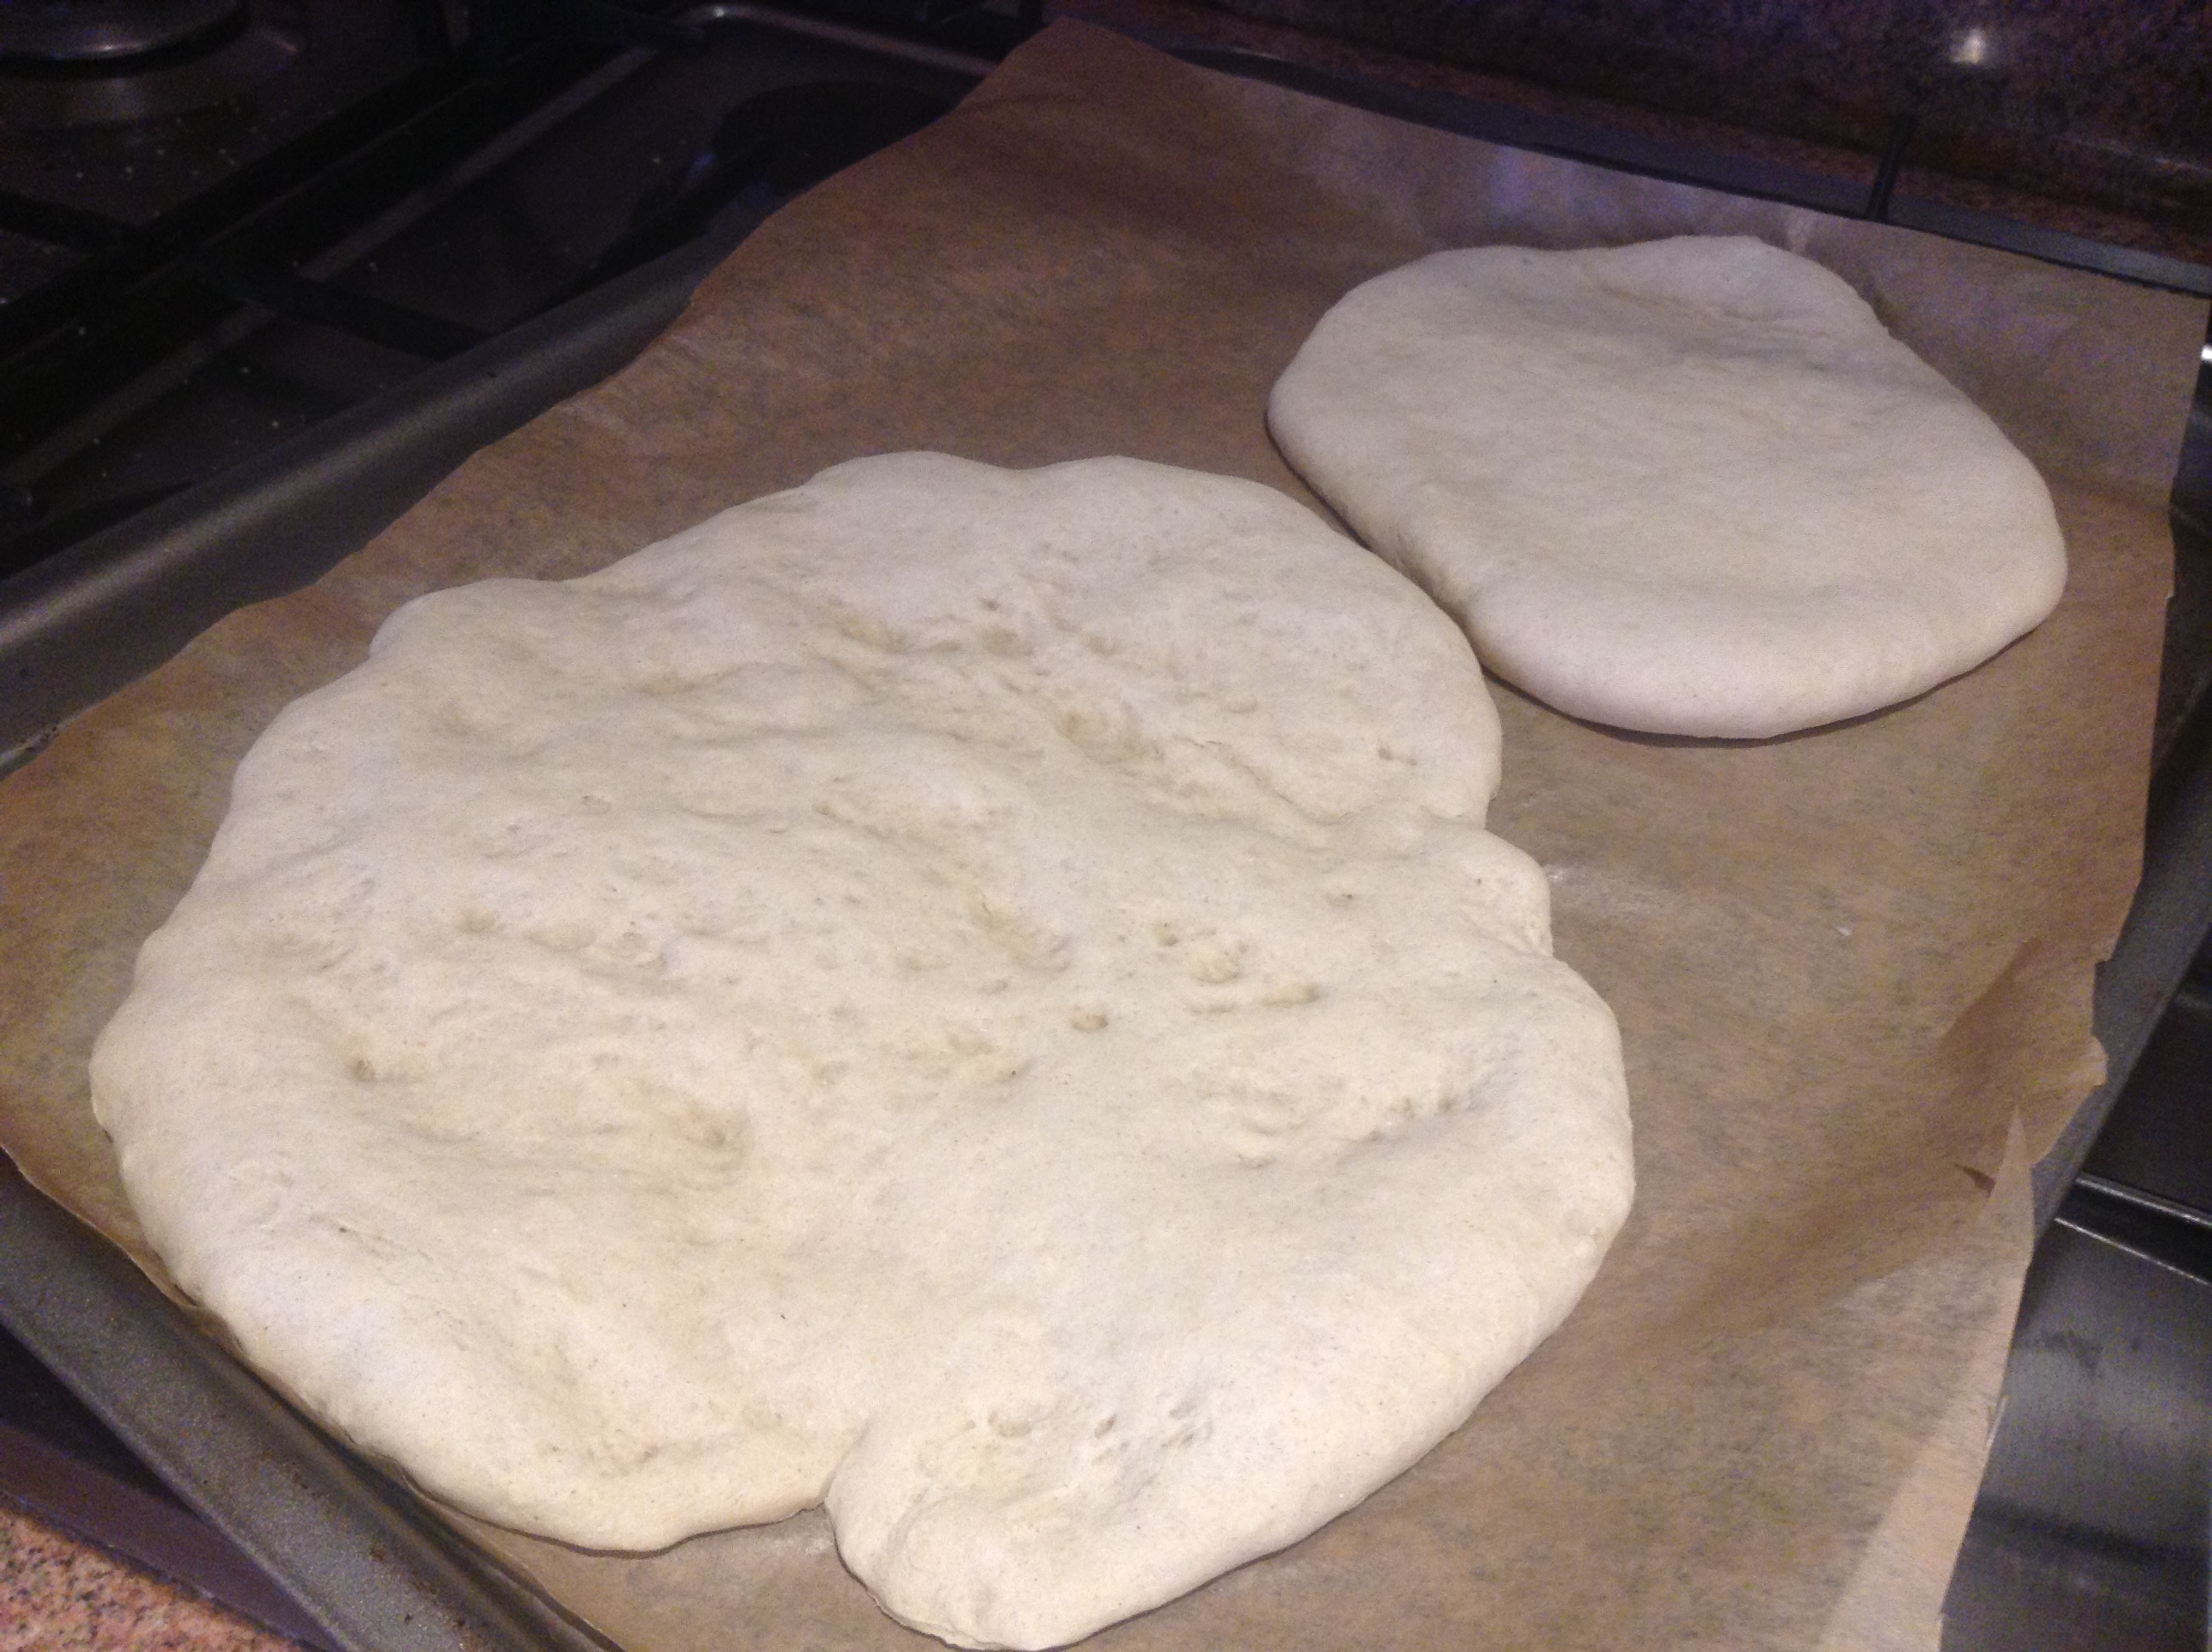
Rolled out and ready for the oven!  I thought it was wise to bake them for 10 minutes first to avoid it to get soggy! This is the pic after the oven btw! Tried a thin base and a thick base.  Always good to try out to different kinds in your first go.  OPTIONS ARE GREAT. Good to know what you prefer!

Image

Toppings are on – and ready to go!

Image

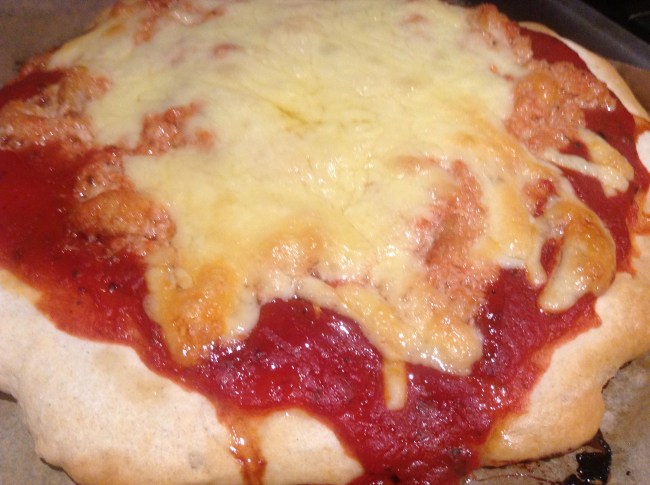
It was that good.  I left out photo-editing as I felt it would be unfair to the pizza to touch it up when it looks this good 😉  Yes pizzas can be personified in my world.

ImageThe pizza deserved a second angle 😉  DELECTABLE. DELICIOUS. SCRUMPTIOUS.

B’s VEGETARIAN TUNA PIZZA 

Makes:  2 Large Pizzas and 1 baby one (LOL)

Ingredients:

  • 2 1/2 cup plain flour
  • 1 tbsp olive oil
  • 3/4 water
  • 1 tsp salt
  • 2 3/4 tsp baking powder
  • Tomato passata, basil, salt and pepper
  • Veg Tuna
  • Cheese

Method:

  1. Mix dry ingredients together.  Add water.  Add oil.
  2. Mix with hands to form a dough.
  3. When it forms into a ball make sure it is not too sticky.  If you’ve added extra water, add a bit more flour to balance it out.
  4. When the texture is right (Smooth) start kneading on a surface with flour for 3-4 minutes.
  5. Roll it out to the desired shape.  I tried my best to make it look like a pizza but one pizza looked like the shape of India on the atlas!
  6. Bake in the oven for 10 minutes at 200 C.
  7. Put tomato passata in a pot and heat it with seasoning.  Mix some of the sauce with the tuna.
  8. Add the tomato base on the pizza, top with tuna and cheese.
  9. Bake for 20 minutes at 200 C or more depending on how you like it!

Enjoy your Vegetarian Tuna Pizza that has no yeast in it’s pizza dough. Yeast is creepy.  Until I overcome my yeast-a-phobia I will be using this recipe as I loved it!  What a find – thank you Terry!

xx

B

Coconut Scones

Hello everyone 🙂 I’ve been experimenting with Scones lately.  I altered the BBC recipe a bit to make coconut scones.  I had to make these twice as I was unsure of the amount of coconut to put in it.  The first go,  I used 50g of coconut.  The second go, I increased it a bit to suit my palette more!

Image

I tried different shapes, just for fun!

B’s Coconut Scones

Bakes: About 12 small scones, but I made some big funky shapes instead.

Ingredients:

  • 225g Self Raising Flour
  • 55g Butter
  • 50g Caster Sugar
  • 75g Fine Desiccated Coconut
  • Pinch of Salt
  • 150ml milk

Method:

  1. Preheat oven to 220C.
  2. Mix together the flour, salt and rub the butter. Make sure the butter is cold.  This ensures softer scones.
  3. Add in the coconut and sugar.  Mix in the milk and knead lightly to a dough.
  4. Move to a floured surface and cut the shapes required.
  5. Brush with milk.
  6. Bake for about 13 minutes, till golden on the top.
  7. Serve with butter.  🙂

I personally like this the best with just butter as you can then appreciate the taste of the coconut.  I raised the amount of sugar in this recipe as a result.  As served with butter, it should be a bit sweeter than a normal scone that is served with jam.

YES, the FOODIE thought about it properly!  Give it a go. You know you want to!

xx

B

Foodie Fridays: Fruit Jelly

My aunt brought me packets of Agar Agar from Singapore, so i decided to use some up!  I googled a few fruit jelly recipes with agar agar as an ingredient so it’ll be vegetarian.  I quite liked this youtube video where this guy mixed agar agar fruit with a cake layer.

I had just made Nutella Cake 2-3 days ago and had some left overs which I could use in the jelly – so this recipe became an instant winner.  A picture of the final product!Image

I put the jelly in small moulds as it made nicer individual treats.  Although next time I want to try it in a cake mould.  A jelly cake with real cake!

B’s Jelly Agar Agar with Strawberries

Makes: 4 small moulds

Ingredients:

  • 2 tsp agar agar powder
  • 3-4 tbsp sugar (you can just omit it if you want)
  • Handful of cut strawberries
  • Some leftover cake cut into cubes

Method:

  1. Arrange strawberries in the mould facing downwards.
  2. Boil half the water and add 1 tsp agar agar and 2 tbsp sugar.  After the powder is dissolved, pour into the mould.  Freeze for 10 mins.
  3. Remove from freezer and pierce the top jelly a bit with a fork.  Add the cubes of cake on top of this layer.
  4. Repeat step 2 for another jelly layer.  Add it.  Freeze for 10 mins.  Refrigerate till you want to eat it.  Remove it from the mould and serve it inverted!

Easy and a great summer delight.  This would make a healthy snack if you omit the sugar out completely.

xx