B’s Easy Guacamole (Avocado Spread) Recipe

HOLY MOLY – GUACAMOLE!

I’m trying to go back to my healthy eating regime.  It’s really a challenge with all the visitors that keep coming to London. No guest would like a bowl of salad for a meal or a healthy spread.  But since everyone’s gone for now – I can eat healthy again.

I made a guacamole spread as I had 2 avocados in the fridge and didn’t feel like eating them raw in salad. It’s really very easy for those of you who haven’t made it before!  I leave out onion and garlic just for the added simplicity.  However, you can fancy it up all you want!

Many people mash the avocado up but I prefer it to be a smoother paste.

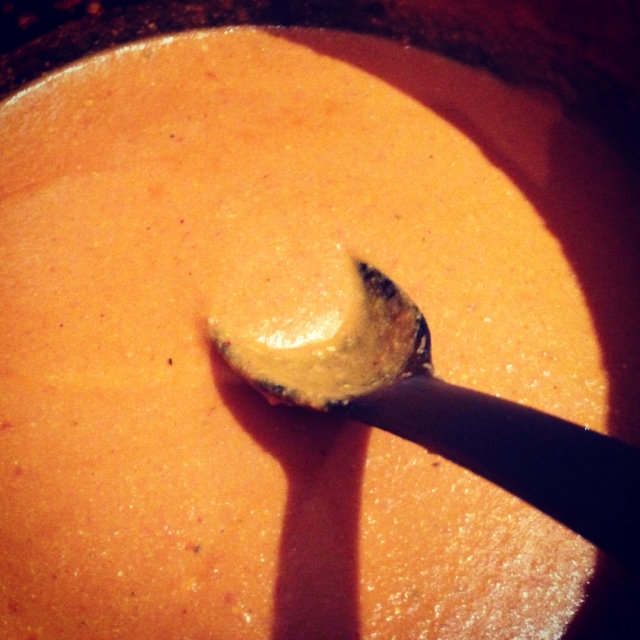
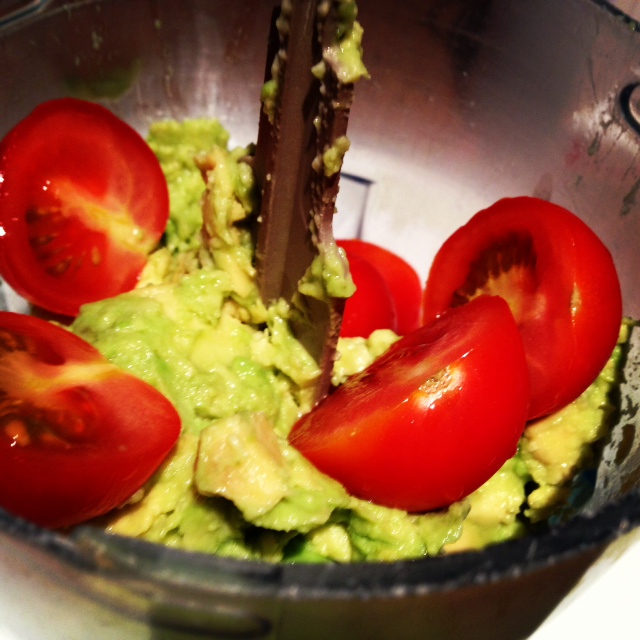
I blended my ingredients to form a paste:

Image
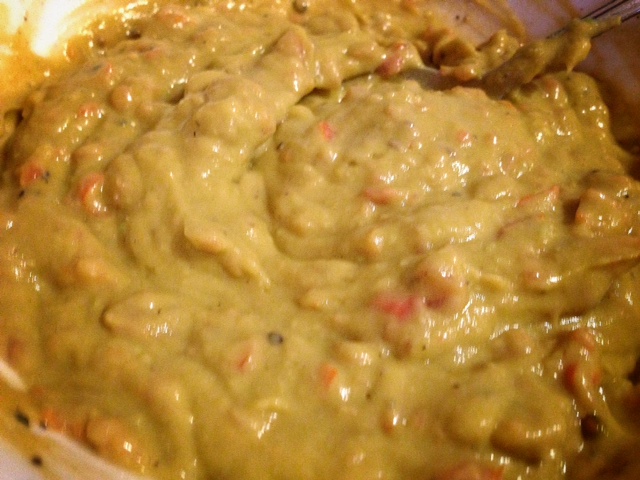
The creamy spread after I seasoned it:

Image

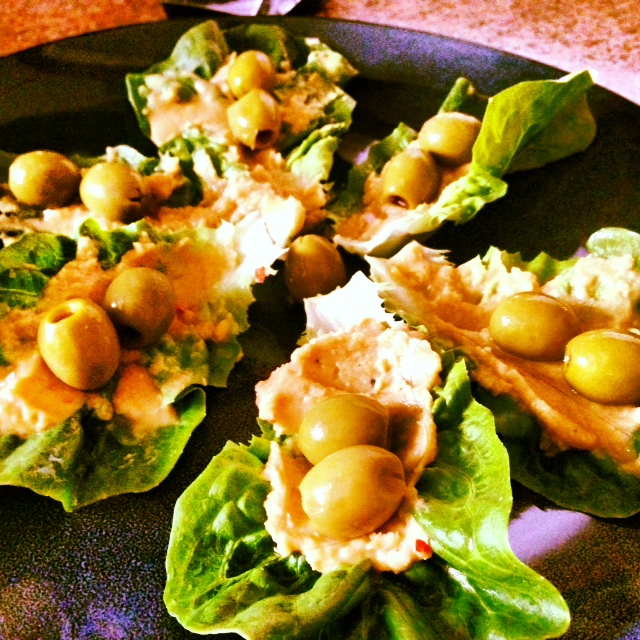
It was lovely!  Tasty and healthy vegetarian food, you can’t go wrong!

B’s Easy Guacamole (Avocado Spread)

Ingredients:

  • 2 avocados (ripened)
  • 4-5 cherry tomatoes
  • 1-2 tbsp lemon juice
  • 1/2 tsp cumin powder
  • Salt and Black Pepper to season

Method:

  • Mash avocado.  Put it into a blender/chopper with cherry tomatoes cut into halves.  Blend till its a creamy paste.
  • Remove into a bowl and season with lemon juice, cumin powder, salt and pepper!

So easy, so tasty, so… there’s just no excuse 🙂

xx

B

B’s Makhani Potato Bake

Hello all!  I’ve been so MIA lately – have been having guest and been so busy,  I made this for my so-so-lovely visitors.  They really enjoyed it 🙂  I made this as I could make the sauce before hand which would give me less stress!! It became sort of an indian butter masala and pasta bake fusion.  Vegetarians sometimes have limited fancy food.  Cheese and potatoes are always a winner.  I would definitely make this again! But I would have to hit the gym several times before that and after that!

Here’s the sauce:

Image

And this is how it looks like fresh out of the oven:Image

Another look at it, to simply tempt you… Yes I love making people hungry!Image

B’s Makhani Potato Bake

Ingredients:

  • Makhani Sauce
  • Baby Potatoes (I bought ready-made herb and butter)
  • Shredded 4 Cheese 
  • Some Tabasco/Dunriver Sauce

Method:

  • Prepare Baby Potatoes
  • Pour yummy sauce over it.  Top up with cheese and tabasco.
  • Bake at 200 degrees and serve while hot.

Enjoy it!  I would suggest it as a leftover whenever you try out my Makhani Paneer 🙂

xx


Coconut Scones

Hello everyone 🙂 I’ve been experimenting with Scones lately.  I altered the BBC recipe a bit to make coconut scones.  I had to make these twice as I was unsure of the amount of coconut to put in it.  The first go,  I used 50g of coconut.  The second go, I increased it a bit to suit my palette more!

Image

I tried different shapes, just for fun!

B’s Coconut Scones

Bakes: About 12 small scones, but I made some big funky shapes instead.

Ingredients:

  • 225g Self Raising Flour
  • 55g Butter
  • 50g Caster Sugar
  • 75g Fine Desiccated Coconut
  • Pinch of Salt
  • 150ml milk

Method:

  1. Preheat oven to 220C.
  2. Mix together the flour, salt and rub the butter. Make sure the butter is cold.  This ensures softer scones.
  3. Add in the coconut and sugar.  Mix in the milk and knead lightly to a dough.
  4. Move to a floured surface and cut the shapes required.
  5. Brush with milk.
  6. Bake for about 13 minutes, till golden on the top.
  7. Serve with butter.  🙂

I personally like this the best with just butter as you can then appreciate the taste of the coconut.  I raised the amount of sugar in this recipe as a result.  As served with butter, it should be a bit sweeter than a normal scone that is served with jam.

YES, the FOODIE thought about it properly!  Give it a go. You know you want to!

xx

B

Easy & Vegan: Scrambled Tofu

Prior to being Vegetarian, one of my favourite combinations was scrambled egg with rice.  Growing up I used to have it like fried rice, more like butter-glistening rice with egg.  It was my go-to comfort food 🙂

I’ve now found a replacement to suit my new vegetarian lifestyle.  It’s been 10 years.  It’s definitely a commitment that I hope would be life-long.  So anyways!  I made tofu scramble for lunch yesterday, didn’t want it to have butter/oil or any fat.  So here’s a low fat, protein filled easy recipe.

But hold on – first have a sneak peak...

Image

It was yummy!  Packed with flavour and grilled asparagus on the side. 🙂

All you need is:

Image

B’s Tofu Scramble

Makes: Enough for 1 (or 2 if you are eating with something else on the side)

Ingredients:

  • 1 packet Firm Silken Tofu (refer to the picture)
  • Seasoning: Turmeric, Red Chilli Powder, Soya Sauce, Salt, Pepper

Method:

  1. Put the block of tofu in the pan.  Keep mashing it.  All the excessive water to evaporated.
  2. It usually takes around 5-7 minutes on high flame.
  3. Keep mashing.  When it is dry and resembles egg, start seasoning.
  4. Start off with some Turmeric (about 1/2 tsp) to give it an egg color.
  5. Add chilli powder, soya sauce, salt and pepper to taste.

Note: I like a lot of flavour, as a result I add a lot of seasoning.  Always remember that tofu, unlike egg is rather bland.  Season away!

Enjoy it with brown rice and a side or even on top of savoury waffles with sausages. (I have had that before too, and it was really good!) 🙂

Enjoy! 

xx

B

B’s Nutella Croissant Bread Pudding

Image

YUMMY.  This recipe came about one day when we didn’t have bread in the pantry but had croissants. We wanted bread pudding but didn’t have bread.  That just sounds ridiculous to not have the core ingredient!  Then I thought to myself – croissants would be a far better substitute.  The texture of croissants allow greater absorption of the creamy mixture and biting into that – would well be somewhat divine.  Bread pudding is already such a treat, can you imagine it with buttery croissants?  My husband LOVES NUTELLA.  He eats it from the jar.  That got me thinking…  Buttery croissant pudding with.. Nutella?  Better still, imagine it with oozing nutella. YUMMY.  So I set it out to make it right!

I’ve made this 2-3 times as its still a pretty new invention.  We had a poker night this weekend, so thought it was ideal for it.  🙂

Here’s the recipe for you to try out!

B’s Nutella Croissant Bread Pudding

Makes: 1 tray/pyrex

Ingredients:

  • 4 butter croissants
  • Nutella (as much as you desire!)
  • 700ml – 1 litre milk (depends how thick you want it)
  • 1 cup double cream
  • 1/3 cup sugar
  • 4 1/2 tbsp custard powder
  • Vanilla essence to taste

Method:

  1. Cut the croissants in half and put Nutella in the middle as a stuffing.
  2. Lay the Nutella prepared croissants in a dish.
  3. Beat together the milk, double cream, custard powder together.  Add the sugar and vanilla essence.
  4. Bake at 180 degrees for about an hour.

Enjoy this easy dessert with simple pantry ingredients!  xx

Foodie Fridays: Fruit Jelly

My aunt brought me packets of Agar Agar from Singapore, so i decided to use some up!  I googled a few fruit jelly recipes with agar agar as an ingredient so it’ll be vegetarian.  I quite liked this youtube video where this guy mixed agar agar fruit with a cake layer.

I had just made Nutella Cake 2-3 days ago and had some left overs which I could use in the jelly – so this recipe became an instant winner.  A picture of the final product!Image

I put the jelly in small moulds as it made nicer individual treats.  Although next time I want to try it in a cake mould.  A jelly cake with real cake!

B’s Jelly Agar Agar with Strawberries

Makes: 4 small moulds

Ingredients:

  • 2 tsp agar agar powder
  • 3-4 tbsp sugar (you can just omit it if you want)
  • Handful of cut strawberries
  • Some leftover cake cut into cubes

Method:

  1. Arrange strawberries in the mould facing downwards.
  2. Boil half the water and add 1 tsp agar agar and 2 tbsp sugar.  After the powder is dissolved, pour into the mould.  Freeze for 10 mins.
  3. Remove from freezer and pierce the top jelly a bit with a fork.  Add the cubes of cake on top of this layer.
  4. Repeat step 2 for another jelly layer.  Add it.  Freeze for 10 mins.  Refrigerate till you want to eat it.  Remove it from the mould and serve it inverted!

Easy and a great summer delight.  This would make a healthy snack if you omit the sugar out completely.

xx

Foodie Fridays: Sago Custard

I’m going for a BBQ at a cousins’ house later in the evening – so thought I’d take something along, just because I’m quite nice that way 😉  Wanted to make something easy (ok so I’m not THAT nice 😉 but nice enough!) What was imperative was that I didn’t have to go hunting for ingredients.  I hate that.  My criteria for being nice was: something basic but tasty.  So I looked through my recipes and came across sago custard.  Sago Custard is a family recipe, my aunt’s to be precise.   I haven’t made it since I lived in Australia.  So really has been ages.

For those of you who have never made sago.  Don’t fear as B is here!  🙂  I’ll guide you step by step.

Firstly, you need sago (made from tapioca FYI) seeds!  If you need to go buy these little tapioca seeds, they look like this:

Image

Secondly: Boil water and add 1/4 cup sago seeds after water is boiling.  Leave it to simmer for 10 minutes.  Keep stirring so the starch content does not stick.

Image

It should like the above after 5-7 minutes.  Where you can still see white dots.  Keep simmering.  The aim is to make it translucent.  After 10 minutes, switch the heat off and cover with a lid for another 10 minutes.  It will then become completely translucent.

Thirdly:  Sieve it with running cold water to remove excess starch.  Keep aside.  The sago is ready to be added to the simple dessert.

Aunt’s SAGO CUSTARD

Makes: One bowl

Ingredients:

  • 2 cups of milk
  • 1/4 cup evaporated milk
  • 3-4 tbsp custard powder
  • 1/4 cup sago
  • 1/3 cup sugar
  • vanilla essence

Method:

  1. Boil milk and sugar.  Add evaporated milk.
  2. Dissolve custard in water.  Add mixture to milk.
  3. Add in pre-boiled and washed sago.
  4. Refrigerate to set.

**It is nice hot as well.  A good dessert for Winter!  I decorated it with strawberries – just cause its prettier that way!

Here’s the final product!  Hope everyone enjoys it at the BBQ 🙂

Image

xx

B

B’s Makhani Paneer

I love indian food in restaurants.  Home indian food usually doesn’t appeal to me much as it doesn’t have that richness.  Subsequently, at home I prefer cooking healthy stir fries (Chinese/Thai/Japanese) or simple indian lentil soup (daal).  I don’t usually try rich creamy food at home. I guess the butter content screams FAT and echoes in my kitchen.  The voices in my head do not allow this.  🙂

However, last week I really wanted Makhani Panner (Butter Tomato Sauce with Cottage Cheese cubes).  This is often accompanied with Naan Bread in restaurants.  We always order this when we are out.  Somehow the calories don’t count when eat out.  The delusional side of me believes that 😉  Since it was a meal at home,  I made wheat chapattis – healthy alternative since the butter content was already alarming.

The butter was worth it.  It was creamy – yummy and easy to make.  My husband swore it tasted like the one in the restaurant.  I had searched for a few recipes online and kind of made it to my own liking.  It was delish!!!! The creamy texture was perfect.

First – you got to mix all the ingredients together.  Always remember – if B can make it, so can you. 🙂  My mom always felt I was too busy with friends and university to ever enter the kitchen.  And now,  I’m trying different dishes all the time! Also – don’t get too alarmed by the list of ingredients.  Most of it consist of indian spices which is pretty basic for indian cooking, and once you have it at home, you can cook anything. 🙂

Image

After all the cooking, you end up with mouth watering Makhani Paneer!

Image

I loved the color!  Yum.  Here’s the recipe 🙂  Happy Cooking!

B’s Makhani Paneer

Makes: Enough for 2-3 people

Ingredients:

  • 1/2 big onion – chopped up
  • 1 big tomato – chopped up
  • 1/3 cup cashewnuts
  • 2 whole dry kashmiri red chillies
  • 2 – 3 tbsp butter (oh my!)
  • 2 pieces of: cinnamon stick, cloves, cardamons
  • 1 bayleaf
  • 4 tbsp tomato puree, 1 tsp concentrated tomato puree
  • 1 tsp garam masala
  • 2 tbsp yoghurt
  • 1/2 tsp sugar
  • 1 cup paneer (indian cottage cheese cubes)

Method:

  1. Boil chopped tomatoes, onions, cashew nuts  chillies with 1 1/2 cup water for 10-15 minutes.  Stir constantly.
  2. Cool and blend it with a bit of concentrated tomato puree.  (just like my first picture on top!)
  3. Heat the butter – and dd the spices (cinnamon, cloves, cardamoms) with the bay leaf.
  4. Add the tomato puree, garam masala and the red gravy and saute for a few minutes. Add salt.  Mix for another 2 minutes.
  5. Add yoghurt and continue mixing to avoid any form of curdling.
  6. Add the sugar.
  7. Add some water (1/2 cup) – depending on the desired thickness.  Add the paneer to mixture.
  8. TA-DA!  Serve with hot naan or chapattis.

Note:  Many people add cream to this mixture (a few tablespoons).  However,  for me the butter was more than enough.  And it tasted just fine!  🙂

Olive and Cheese Breadsticks (Bisquick)

Just made dinner (Roasted Cherry Tomato Pasta) and thought homemade breadsticks would be the perfect side. I wanted something easy to be honest as I’m pretty tired.  Although saying that, compromising the taste is not an option for me. Bisquick. Quick being the key word was an effervescent moment.  This just seemed perfect.

I’d come across Betty Crocker’s Recipe a few days ago and tried it out today.

Image

It was simply delectable considering how easy it was.  It was more beautiful than my picture. It was definitely one of those moments – love at first bite.  You must try it out.

Olive and Cheese Breadsticks

Makes: About 15

Ingredients:

Method:

  1. Heat oven to 350°. Spray 2 cookie sheets with cooking spray. Stir Bisquick mix, milk, cheese and olives until soft dough forms. Place dough on surface dusted with Bisquick mix; gently roll in Bisquick mix to coat. Shape into a ball; knead 10 times.
  2. Divide dough into 15 equal parts. Roll each into a breadstick about 8 inches long. Place on cookie sheet.
  3. Brush milk over dough. Bake 11 to 14 minutes or until light golden brown. Serve warm with olive oil or marinara sauce for dipping.

**Note the recipe is exactly the same as the Betty Crocker link.  I’ve only changed brushing the breadsticks with egg to milk.  Now it’s completely vegetarian! 

Foodie Fridays: B’s Mediterranean Lettuce Cups

Hope everyones doing well.  It’s Friday so I’m sure the weekend makes everyone smile. 🙂

Foodie Fridays have been pretty fatty, should be called Fatty Fridays honestly.  Today was pretty healthy – I have to admit.  Well so far at least!  I had leftover hummus (the link will direct you to my recipe) from yesterday and thought I’d eat it differently.  Had Baby Gem Lettuce in the fridge which made me think of lettuce cups!  Baby Gem Lettuce are the best for lettuce cups as the shape holds very well as opposed to other types of lettuce – just FYI. I strongly recommend it!

hummus cups

Don’t they just look absolutely yummy?  They were better than good enough to eat, as far as the aphorism goes.  Very refreshing for a hot day in London (rare to have hot days here!).  Surprisingly, even my husband loved it for lunch.  For him it was more of a snack to be honest!

B’s Mediterranean Lettuce Cups

Makes: As many as your leftover hummus can fill!

Ingredients:

  • Hummus (home-made) or store bought
  • Baby Gem Lettuce
  • Olives

Method:

  1. Wash lettuce with cold water and assemble in a plate.  Leave it in the fridge for 10 mins if you want it nice and chilled.
  2. Spread hummus on it.  Top it off with olives!
  3. Voila! Eat and enjoy 🙂

So simple.  Yet so delicious and pretty!

xx

B