
XOXO Everyone!
Much Love
xo
B
XOXO Everyone!
Much Love
xo
B
Hello all…! Hope all of you are having a blissful Friday where you are eating merrily. To celebrate the upcoming weekend of course 🙂

Here’s a gorgeous, easy vegetarian meal for you all to whip up! 🙂 Hope you enjoy it! x
B’s Easy Beany & Cheesy Tacos
Makes: Enough for 2 people with a hearty appetite
Ingredients:
Method:
Easy meal for a busy day – and I tried to sneak in flaxseeds and my husband didn’t know! Yaey! 🙂
xx
B
Hello everyone! I’ve finally tried a cashew spread that I’ve become reading on vegan blogs forever… Although, a Vitamix seems to do a much creamier job. Maybe one day I’ll finally invest in on – or maybe I’ll win one! Haha! There’s always a benefit to being optimistic. Or maybe Vitamix will read this and want to give me one. OK SO MAYBE.
 \
\
It kind of resembled Ricotta Cheese but a lot healthier 🙂
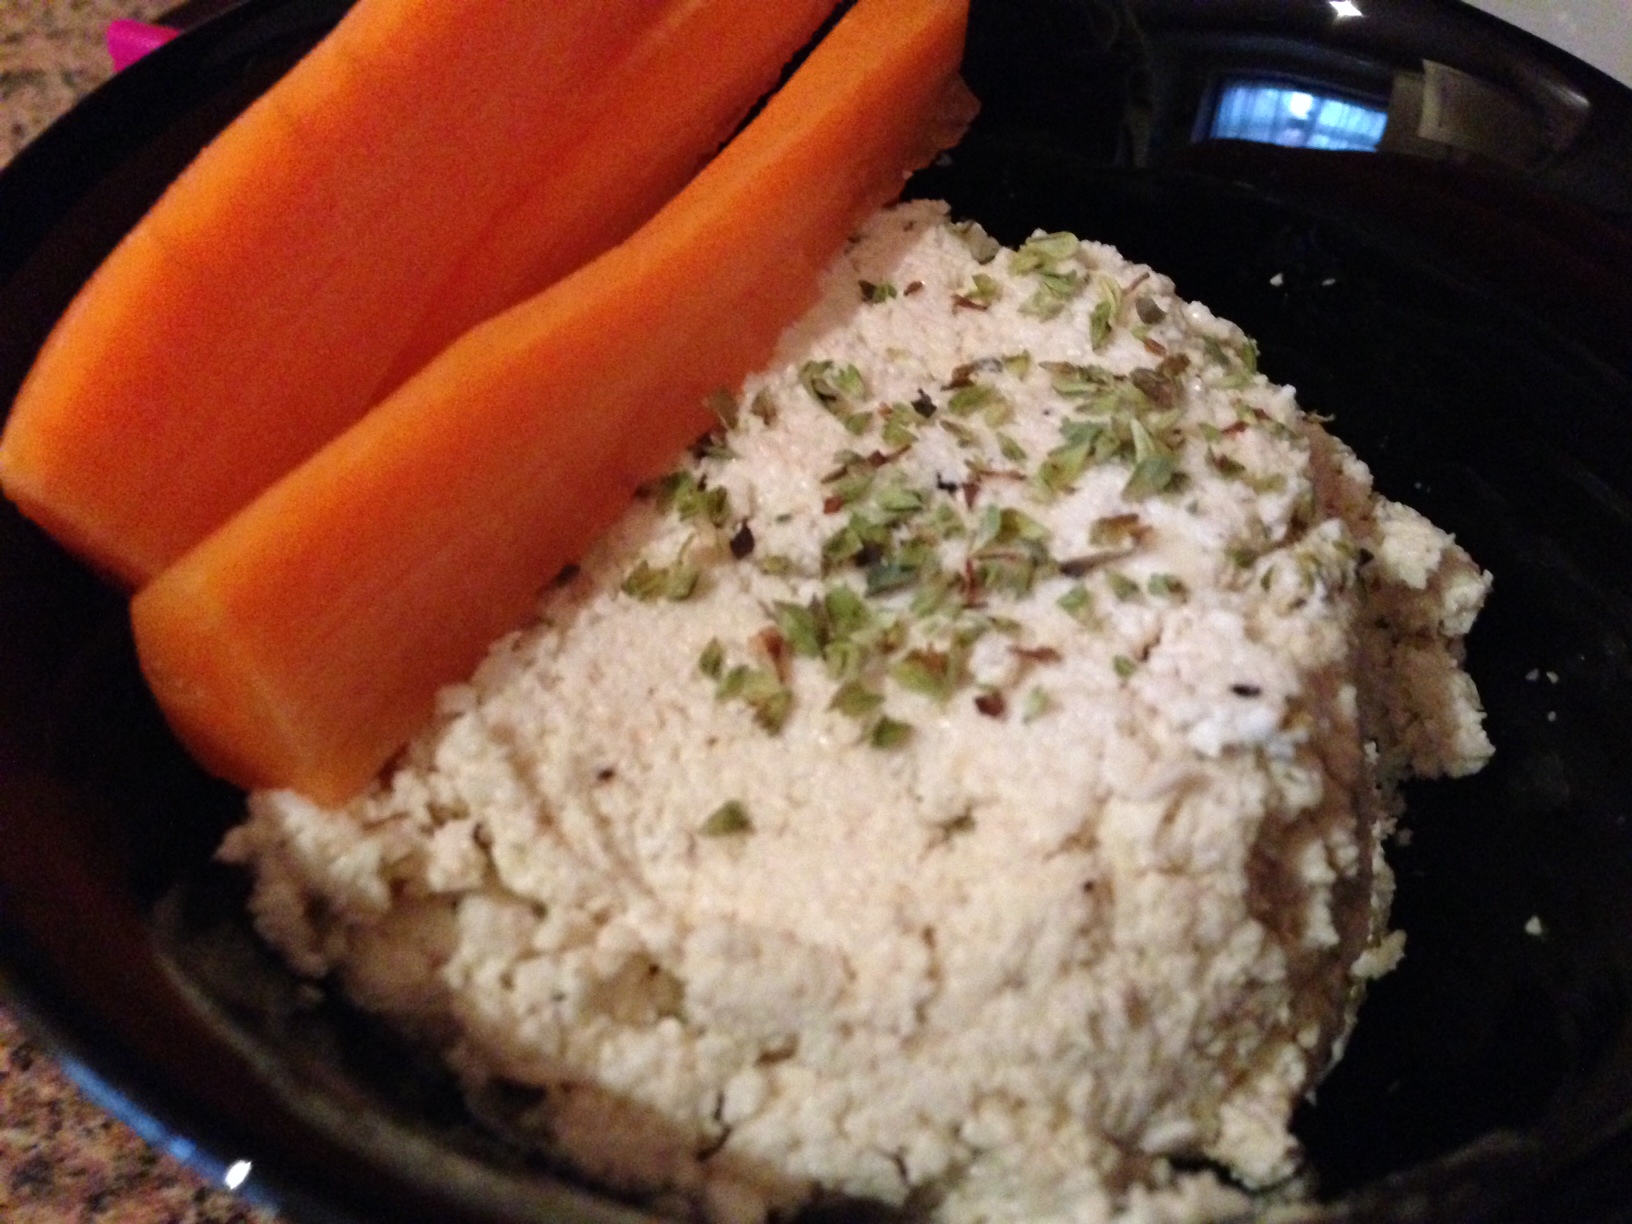
I’ve been using it as a dip for carrots 🙂
B’s Oregano Cashew Dip
Makes: Enough for 2-3 people as a side
Ingredients:
Method:
Hope you enjoy this vegan dish! I absolutely loved it as a healthy alternative. It’s very easy too 🙂
xx
B
You are my SUNSHINE! MY ONLY SUNSHINE.. YOU MAKE ME HAPPY.. DA DA DA DUM DUM *And so the song goes!*

Thank you for the nominations: Ginger, Elaine, Danielle, and Upasna! I thought I’d blog about this. Blog awards make me feel happy 🙂
Rules to Accept the Award:
My answers are as follows:
My nominees are (I’m trying to nominate my new blogging friends):
Check out these bloggers as they add sunshine to the blogosphere!
Enjoy your weekend everyone!
xx
B
Hello all! Today we felt like having noodles – okay when I say we I actually mean more my husband than me. I rather make something that would be appreciated to be eaten. The chef needs to be appreciated. When the eater goes hmmmm – it makes the chef feel good about the hard work that went into it 🙂 Ok – I have absolutely no idea why I’m calling myself a chef and speaking in third person today! I’m going to stop. LOL 🙂
Chinese Crispy noodles involve deep-frying and I didn’t feel like something so unhealthy so I made the exact gravy and had it with boiled noodles. However – for those of you who want to try it crispy – you can deep fry it or acti-fry it (less oil and same result).
I loved the way it looked.
 Doesn’t it just look delish with the veggie chicken topped on it? It gave it a really new chewy texture!
B’s Vegetarian Chinese Crispy Noodles
Makes: Enough for 3-4
Ingredients:
Method:
Makes a one-pot vegetarian meal. Easy to make and healthy 🙂
Enjoy!
x
B

Enjoy your weekend everyone! 🙂
xx
B
Yummy. Home-made pesto cannot be compared to the store bought kind at all! It simply melts in your mouth. I made the pesto a day earlier as I wanted it to sit in the fridge overnight to make it more flavourful. Pesto and Brushchetta are both notoriously famous for their garlic flavour. I however do not like garlic. I find the smell rather pungent and the after-taste deadly. So here you have it Basil and Brushchetta without garlic. Feel free to add garlic if you like the taste as it does enhance it for garlic-fans!
Here’s a picture of my masterpiece 😉
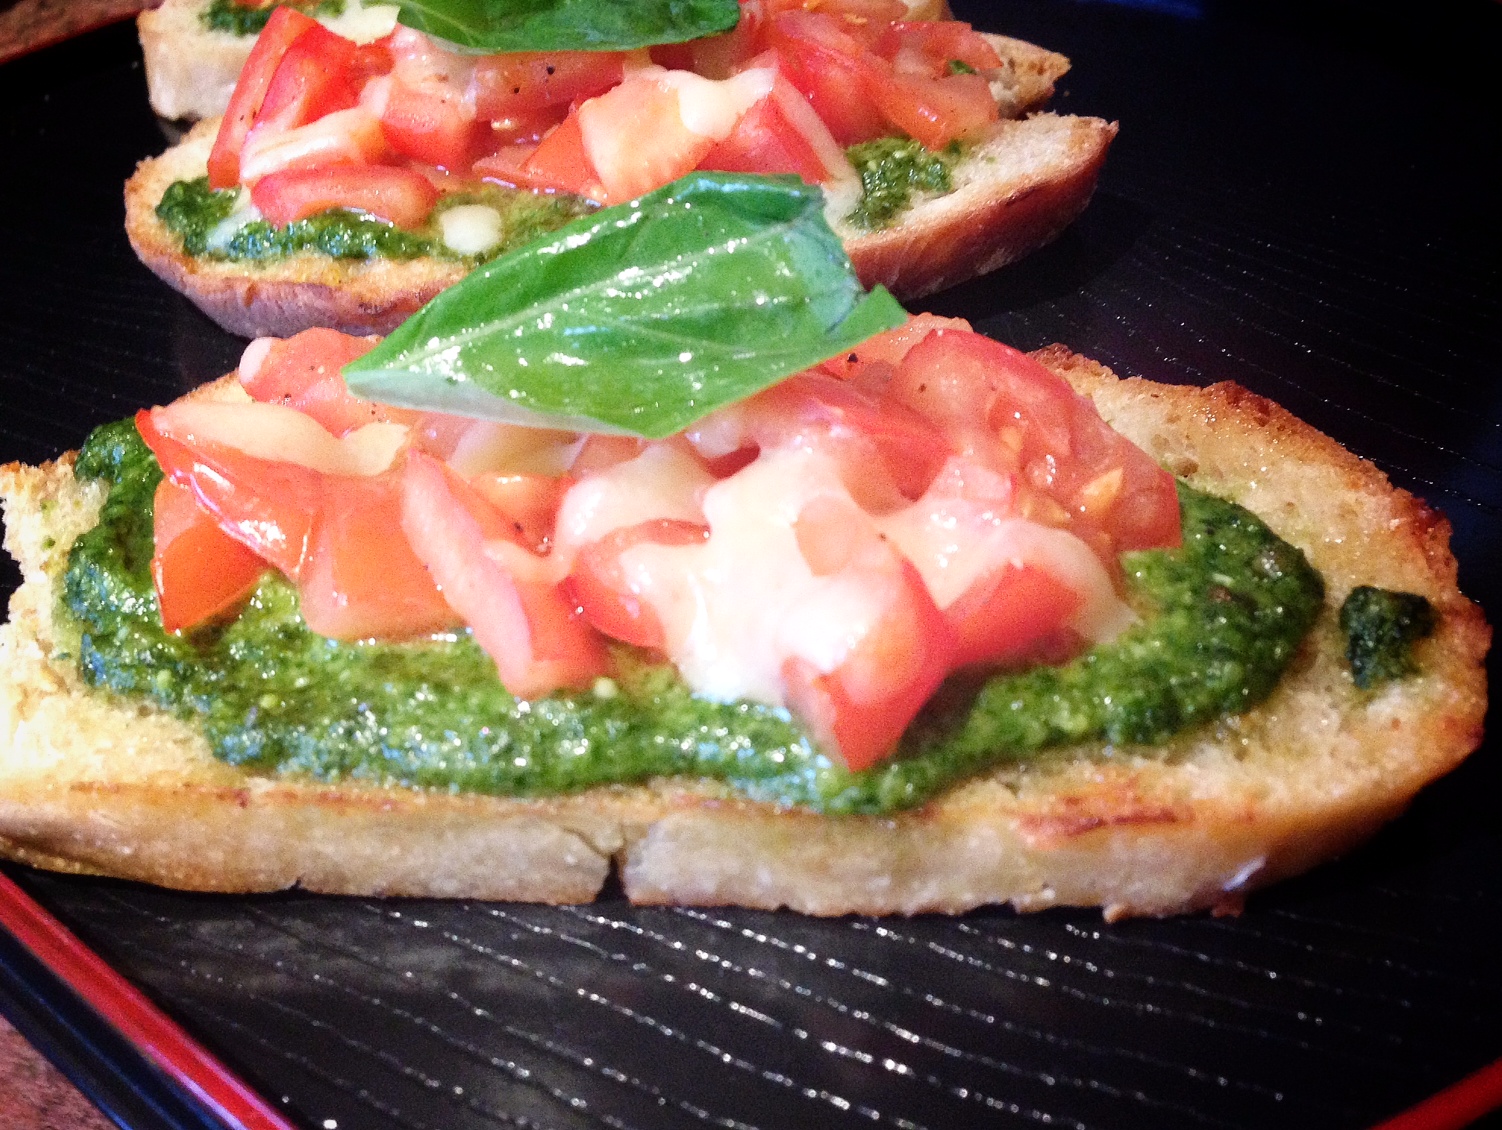
Doesn’t that just look gorgeous? YES – food can look gorgeous. 😉
Here’s what I did..
First I made the pesto…
 Blend. Blend. Blend.
Then I used my home-made bread (pan-toasted first) and topped it with everything. Ready to go in the oven!

And out it comes! All ready to feast on. It screams EAT ME NOW! 🙂
B’s Basil Pesto Brushchetta
Makes: As many as you spread!
Ingredients for pesto:
Ingredients for Brushchetta:
Method:
YUMMYYYYY!
Enjoy 🙂
xx
B
I’ve been eating popcorn on and off in the cinema lately. I know I shouldn’t – but I can’t help it. Sometimes, I make it at home, my stove-popcorn style. However, the popcorn only pops with at least 3 tbsp of oil! Ok, that’s to feed two very hungry people. LOL 🙂
So I went on amazon and decided to order a fat-free popcorn maker. It was 20 pounds with free shipping. Really a good deal! It just arrived – and I couldn’t resist but try some!

Thought I’d add the pamphlet – incase anyone wants to order it too (all the info is on there!)
Pros:
Cons:
Having said all this, I would recommend it. It makes a very easy snack when you are in a peckish mood. 🙂 Also, popcorn is rich in fibre and low in fat. It’s oil-free with this device!
TO BUY OR NOT TO BUY? TO BUY
xx
B
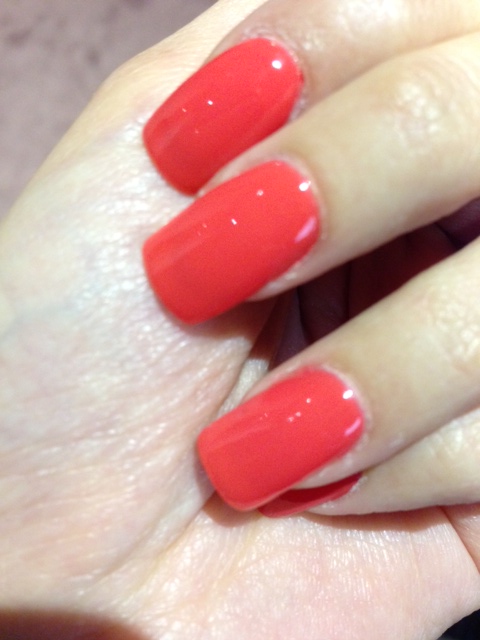
Got my nails done today in a bright color! OPI – Mo-dern Girl! I have to give them credit for their names.
Hope Monday Blues haven’t gotten to you 🙂
X
Hello happy humans! It’s Friday 😉 I love sleeping in on Saturday – the feeling is just magical. So I’ve had a busy day involving completing my App’s ICON! How amazing is that? I’m terribly excited. 🙂 Coming back to Foodie Fridays – I’ve been eating healthy food at home to compensate for fatty food that will be coming my way (weekend). I had udon noodles and veggies at home – and thought it would be a healthy vegetarian lunch for my husband and I. It’s been so cold in London, so it was really comforting as well. This is an easy meal to whip up too when you are busy but do not want to eat out of a packet! 🙂
FYI: Work with two pans – it’s faster and easier to serve the noodles then pour the soup mixture on top!
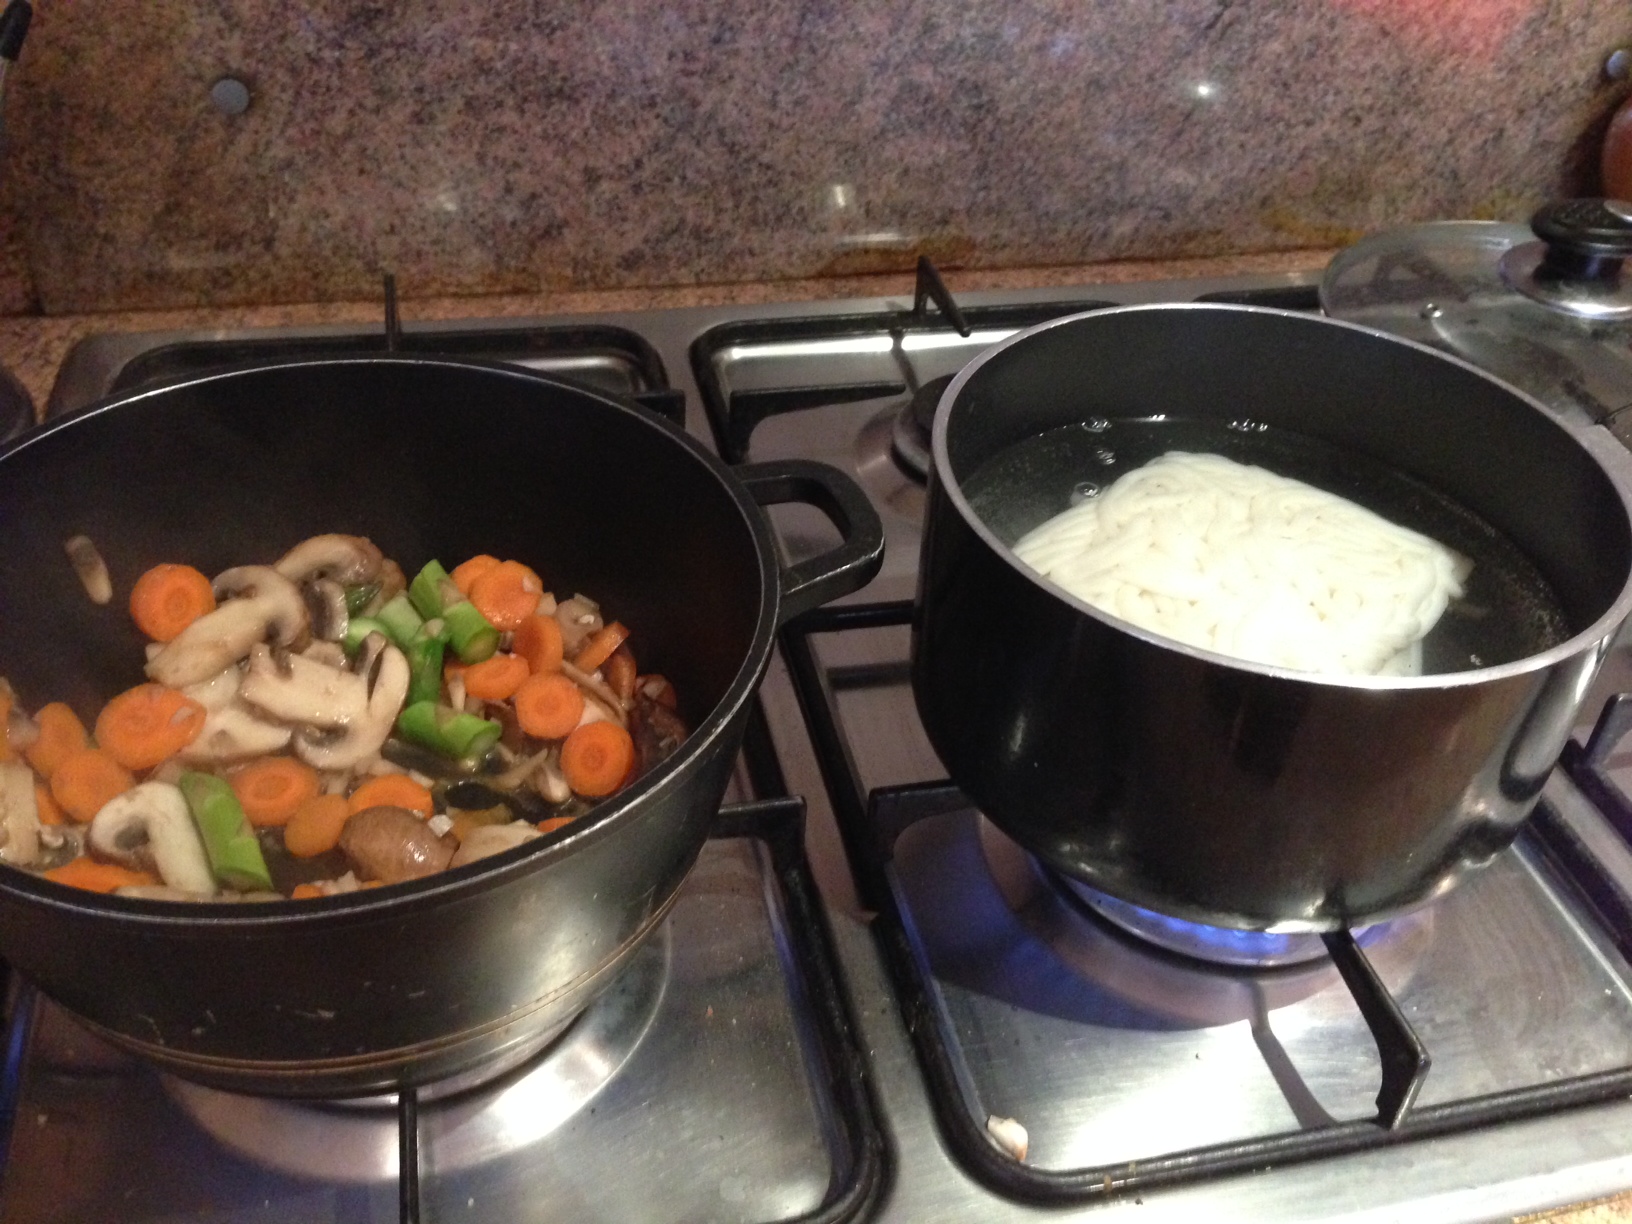
And the end result:

Healthy veggies & tofu 🙂
B’s Kitsune Udon (Japanese Noodle Soup)
Makes enough for 2 people
Ingredients:
Method:
Note: Kitsune Udon is usually prepared with fried tofu which is available in Asian Shops. It has a spongy texture and absorbs flavour very well. However the fat sitting on my stomach right now is not allowing me to eat that kind of tofu. SO THERE YOU HAVE IT. Low fat. You can change the veggies to your liking – I just used up what I had in my pantry!
Hope everyone has a fantastic weekend! I’m going for some retail therapy this weekend. It’s been a hectic week -that’s why I’ve barely posted!
xx
B
