B’s Summer Salad

It’s summer in London.  No way! Yeah,  I have this conversation daily in my head when I’m dressed in a long sleeve shirt topped with a light jacket.  But seriously, today the sun’s out!  😉  I deserve to whip up a summer salad in celebration. It’s a mix of italian and greek salad.  Basically combined my favourite parts from both.  So here it is!

Image

I used this on the top (Marinated Feta Cubes):

Image

B’s Summer Salad

Makes: 1 big bowl 

Ingredients for the dressing:

  • 3 tbsp olive oil
  • 2 tbsp vinegar
  • 1 tbsp lemon juice (might add more next time)
  • 1 tbsp dried basil
  • Salt, Pepper, Chilli flakes and Oregano – to taste

Ingredients for the Salad:

  • Romaine Lettuce, Cherry Tomatoes (halved), 1 Avocado, Marinated Feta Cheese cubes, olives and anything else you have in your fridge that you like 🙂

Method: 

  • Mix dressing together in a bowl.  Chill overnight.  I always believe dressings are best the next day as the flavours are enhanced!
  • Serve over cut salad 🙂

B’s Nutella Croissant Bread Pudding

Image

YUMMY.  This recipe came about one day when we didn’t have bread in the pantry but had croissants. We wanted bread pudding but didn’t have bread.  That just sounds ridiculous to not have the core ingredient!  Then I thought to myself – croissants would be a far better substitute.  The texture of croissants allow greater absorption of the creamy mixture and biting into that – would well be somewhat divine.  Bread pudding is already such a treat, can you imagine it with buttery croissants?  My husband LOVES NUTELLA.  He eats it from the jar.  That got me thinking…  Buttery croissant pudding with.. Nutella?  Better still, imagine it with oozing nutella. YUMMY.  So I set it out to make it right!

I’ve made this 2-3 times as its still a pretty new invention.  We had a poker night this weekend, so thought it was ideal for it.  🙂

Here’s the recipe for you to try out!

B’s Nutella Croissant Bread Pudding

Makes: 1 tray/pyrex

Ingredients:

  • 4 butter croissants
  • Nutella (as much as you desire!)
  • 700ml – 1 litre milk (depends how thick you want it)
  • 1 cup double cream
  • 1/3 cup sugar
  • 4 1/2 tbsp custard powder
  • Vanilla essence to taste

Method:

  1. Cut the croissants in half and put Nutella in the middle as a stuffing.
  2. Lay the Nutella prepared croissants in a dish.
  3. Beat together the milk, double cream, custard powder together.  Add the sugar and vanilla essence.
  4. Bake at 180 degrees for about an hour.

Enjoy this easy dessert with simple pantry ingredients!  xx

A Quick Hello!

Hello World! 

I’ve really missed the excitement that comes with blogging in the past few days.  I’ve been away and I’ve just got in.  We did our anniversary trip to Vienna and then joined my cousins in Dublin for a family trip!  It was simply fantastic. I will be blogging all about my latest travels shortly after uploading all my thousands of photos.  The process of selecting photos is possibly the most annoying consequence of travelling.  First world problems? haha

xx

B


Bright Summery Nails!

Sunshine, a word that seems to now exist in London.  I’m loving the weather.  It’s surprising how the weather can affect a person’s mood and even the colours they choose to wear on a daily basis.  When I moved to London my first impression of British was that they wore rather “dull clothes” which seemed to reflect the “grey” weather of the country. On the contrary, the Aussies are bright reflecting the sunshine of the country.  Does this also affect people’s moods?I guess the weather does play a role, but the extent of which it affects behaviour and mood is questionable.  I guess an easy scapegoat for people being in a foul mood would be “blame it on the weather”.

I LOVE COLOR.  The last few days I’ve been enjoying bright colours to reflect the beautiful bright weather.

Today I made a trip to the nail salon (poor husband hehe) and got a nice bright summery print done!

Image

I love it!

xx

B

Travel Thursdays: Future Travel Plans

Travelling is simply fulfilling.  It makes you feel alive.  It makes you get out of your comfort zone and have a different ontological experience.  It is a must.

Our next destination is Vienna!  Stay tuned – will be posting all about it in the next few weeks.  For now if there are any suggestions, or must-sees do drop me a comment!

xx

B

B’s Makhani Paneer

I love indian food in restaurants.  Home indian food usually doesn’t appeal to me much as it doesn’t have that richness.  Subsequently, at home I prefer cooking healthy stir fries (Chinese/Thai/Japanese) or simple indian lentil soup (daal).  I don’t usually try rich creamy food at home. I guess the butter content screams FAT and echoes in my kitchen.  The voices in my head do not allow this.  🙂

However, last week I really wanted Makhani Panner (Butter Tomato Sauce with Cottage Cheese cubes).  This is often accompanied with Naan Bread in restaurants.  We always order this when we are out.  Somehow the calories don’t count when eat out.  The delusional side of me believes that 😉  Since it was a meal at home,  I made wheat chapattis – healthy alternative since the butter content was already alarming.

The butter was worth it.  It was creamy – yummy and easy to make.  My husband swore it tasted like the one in the restaurant.  I had searched for a few recipes online and kind of made it to my own liking.  It was delish!!!! The creamy texture was perfect.

First – you got to mix all the ingredients together.  Always remember – if B can make it, so can you. 🙂  My mom always felt I was too busy with friends and university to ever enter the kitchen.  And now,  I’m trying different dishes all the time! Also – don’t get too alarmed by the list of ingredients.  Most of it consist of indian spices which is pretty basic for indian cooking, and once you have it at home, you can cook anything. 🙂

Image

After all the cooking, you end up with mouth watering Makhani Paneer!

Image

I loved the color!  Yum.  Here’s the recipe 🙂  Happy Cooking!

B’s Makhani Paneer

Makes: Enough for 2-3 people

Ingredients:

  • 1/2 big onion – chopped up
  • 1 big tomato – chopped up
  • 1/3 cup cashewnuts
  • 2 whole dry kashmiri red chillies
  • 2 – 3 tbsp butter (oh my!)
  • 2 pieces of: cinnamon stick, cloves, cardamons
  • 1 bayleaf
  • 4 tbsp tomato puree, 1 tsp concentrated tomato puree
  • 1 tsp garam masala
  • 2 tbsp yoghurt
  • 1/2 tsp sugar
  • 1 cup paneer (indian cottage cheese cubes)

Method:

  1. Boil chopped tomatoes, onions, cashew nuts  chillies with 1 1/2 cup water for 10-15 minutes.  Stir constantly.
  2. Cool and blend it with a bit of concentrated tomato puree.  (just like my first picture on top!)
  3. Heat the butter – and dd the spices (cinnamon, cloves, cardamoms) with the bay leaf.
  4. Add the tomato puree, garam masala and the red gravy and saute for a few minutes. Add salt.  Mix for another 2 minutes.
  5. Add yoghurt and continue mixing to avoid any form of curdling.
  6. Add the sugar.
  7. Add some water (1/2 cup) – depending on the desired thickness.  Add the paneer to mixture.
  8. TA-DA!  Serve with hot naan or chapattis.

Note:  Many people add cream to this mixture (a few tablespoons).  However,  for me the butter was more than enough.  And it tasted just fine!  🙂

Olive and Cheese Breadsticks (Bisquick)

Just made dinner (Roasted Cherry Tomato Pasta) and thought homemade breadsticks would be the perfect side. I wanted something easy to be honest as I’m pretty tired.  Although saying that, compromising the taste is not an option for me. Bisquick. Quick being the key word was an effervescent moment.  This just seemed perfect.

I’d come across Betty Crocker’s Recipe a few days ago and tried it out today.

Image

It was simply delectable considering how easy it was.  It was more beautiful than my picture. It was definitely one of those moments – love at first bite.  You must try it out.

Olive and Cheese Breadsticks

Makes: About 15

Ingredients:

Method:

  1. Heat oven to 350°. Spray 2 cookie sheets with cooking spray. Stir Bisquick mix, milk, cheese and olives until soft dough forms. Place dough on surface dusted with Bisquick mix; gently roll in Bisquick mix to coat. Shape into a ball; knead 10 times.
  2. Divide dough into 15 equal parts. Roll each into a breadstick about 8 inches long. Place on cookie sheet.
  3. Brush milk over dough. Bake 11 to 14 minutes or until light golden brown. Serve warm with olive oil or marinara sauce for dipping.

**Note the recipe is exactly the same as the Betty Crocker link.  I’ve only changed brushing the breadsticks with egg to milk.  Now it’s completely vegetarian! 

B’s Quick & Healthy Hummus Recipe

Hello everyone!  I’ve restarted my gym regime which means just one thing: time to zip my mouth to everything tempting.  Hmmm… Or so you would think.  I’ve decided to try out healthy dips and snacks that are still tempting minus the high calorie count.  Today I tried out my very own hummus recipe.  Basically most recipes online for hummus incorporate a high level of olive oil.  Fair enough, in the restaurants it is served that way – but if I eat my carrot sticks in an oil based dip, what good is it really?

Mixing everything up to form a smooth creamy paste:

Image

And the final product:

Image

Here’s my recipe:

B’s Quick & Healthy Hummus Recipe

Makes: One bowl

Ingredients:

  • 1 can chickpeas
  • 1 tbsp olive oil
  • Pinch of chilli flakes/paprika
  • 1 tsp cumin powder
  • 3-4 tbsp water
  • 1 tbsp lemon juice
  • Salt and Pepper to taste

Method:

  1. Spoon chickpeas from the can instead of draining.  The liquid adds flavour!
  2. Add all ingredients and blend away 🙂

Note:  Adjust the consistency to your preference by adding more or less water.  Best served chilled – I refrigerated it for 15 mins. I couldn’t wait any longer! 🙂

Enjoy!!

xx

B

Poha! – Flattened Rice

Poha – an unusual name that reminds me of Po  (The Teletubbies). Eh-oh! Oh God, I feel as though I have come from a completely different era, at the thought of the song.  Yes, it is playing in my head right now.  What a drag.

Anyways,  today I tried a new dish and wanted to blog about it 🙂  I made Poha, a south-indian lunchtime dish made from flattened rice.

It’s easily available in Asian Supermarkets in the Indian section.  My sister mentioned this dish to me after her trip to South India (Kerela) and said it was very easy to make.  In addition, it’s nutritious which led me to giving it a go.  The recipe below is a rough guide as I made it up as I went along (kind of like how indian fried rice is made).  Feel free to adjust the flavours and quantities as you like.

B’s Simple Poha

Makes: Enough for 4 people

Ingredients:

  • 1 medium sized flakes Poha packet (300g or so)
  • 1 onion
  • 2 tomatoes
  • 1 green chilli
  • 1 cup of okra
  • 1 big potato
  • 1 heaped tsp Ghee/butter/oil
  • Indian Spices: Cumin seeds, Curry powder, Red Chilli Powder, Cumin Powder, Garam Masala Powder, Turmeric Powder
  • Peanuts

Method:

  1. Preparation: Put Okra in the oven for 20 mins.  And par-boil the potato.
  2. Heat ghee in pan then add 1 tsp of cumin seeds for 1 minute. Then add chopped onions.  Saute on low fire for about 8 mins until onions are cooked.
  3. Add chopped tomatoes to the onions and saute.  Add a bit of water to cook the tomatoes.  Add 1 chopped green chilli to the mixture.
  4. Cook for about 5 minutes till a mixture forms (Steps 1-3 are the same for any indian cuisine FYI).
  5. Now add all the indian spices to taste.  Stir it, allowing mixture to absorb all the flavours.
  6. Cut both the okra and potato in bite-size pieces.  Add this to the mixture.
  7. Lastly, rinse the poha and drain it slightly.  Add to the pan and mix.  If it is a bit dry and some water while mixing as it tends to absorb water like rice.  Adjust flavours according to taste.
  8. Serve hot with peanuts on top for the extra crunch.

Note:  We had this with a side portion of cucumbers and yoghurt.  Also, I made daal (indian lentil soup) to supplement the meal.

Here’s a picture of my POHA! (Yes, I’m very much entertained by the name.  As I typed it in caps it reminded me of my ALOHA! post. 🙂  hahaha POHA!)

Image

Cheers to Poha! Let me know if you try it out.

xx

B

Aloha! Mom’s 50th Birthday Pineapple Fried Rice

Just a little hello from Hawaii. Ok not quite. I’m back home in London.

I just got back from Singapore yesterday.  Surprisingly, I missed blogging. It’s weird as I’m still a new member of this blogging community. 🙂

I had a heart-warming trip back home – meeting close family and friends as we celebrated my Mom’s 50th birthday!  We threw a Hawaiian-themed party.  My mom’s favourite holiday destination has always been Hawaii. We have been there 8 times together as a family when we lived in Japan (pretty awesome, huh?) Honestly, as a child exploring Hawaii was nothing less than a fairy tale.  Beautiful beaches, hotels, luas, and culture.  I vividly remember swimming with dolphins in Waikoloa Hilton! I was just 11 years-old and was in exuberance.  Hawaii is a must-see.  Add it to your bucket list if its not there yet 🙂

I love beautiful decor. I love aesthetics. I love all things bright and beautiful! So I enjoyed shopping for decor thoroughly.  I’m thinking of having an e-shop for decor, so will let you guys know if that idea falls through.  As having family business we have access to a whole sale shop – thus the price I buy at, is much much cheaper than a normal retail shop.  So if I do sell to individual people online, whilst I’d be making a marginal profit – the consumer still pays much less than retail price! It’s a win-win!

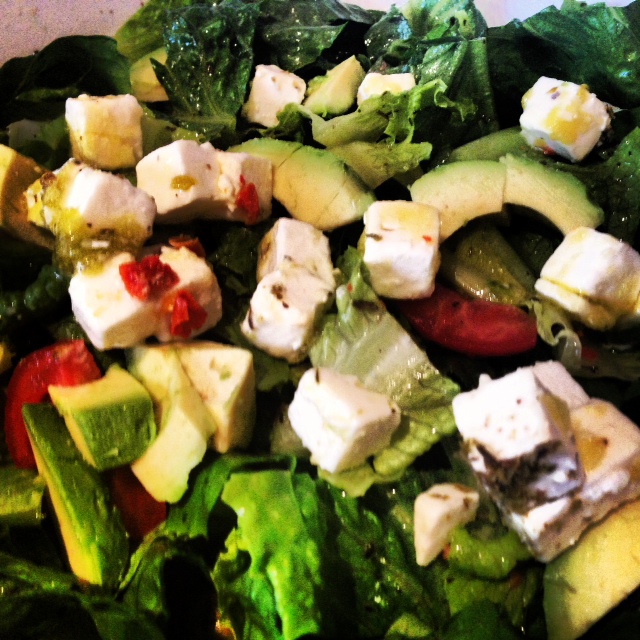
Some pictures to illustrate our theme:

Image

We attempted to make pineapple fried rice – which turned out pretty exotic.  However, the one that I ate in Hua Hin was still better! I am in desperate need to find the secret ingredient!  I googled a few recipes and some suggest adding curry powder, so I may try that in the future.  My sister created this recipe FYI!

A quick overview of the recipe – nothing was actually measured, so go with the flow!

 Pineapple Fried Rice (Quick and Easy for a Party!)

Ingredients:

  • 1 onion
  • Some veggies (your choice!)
  • Cooked rice
  • Oil
  • A full pineapple
  • Seasonings: salt, pepper, chilli powder, light soya sauce, dark soya sauce , curry powder

Method:

1) Sauté some onions with oil.  Add your choice of finely chopped vegetables

2) Add salt, pepper, soya sauce, chilli powder to the mixture

3) After vegetables are cooked well and flavoured to taste (I’d suggest curry powder as well) add cooked rice and mix well.

4) Cut pineapple in half and scoop out the filling neatly.  Cut pineapple into desired size and throw in the fried rice and mix.

5)  Serve the fried rice in the pineapple half!

Here’s the picture of her result:

Image

I was very impressed with the presentation of this dish!  It really added to the

mise-en-scene of the party for sure.  Let me know how it goes if you try it out!